1Attach the thermo container at a readily accessible point on the aquarium. Remove protective film from adhesive strip. Stick thermo
container in position uprightat the topof a clean, grease-freepane of the aquarium and press firmly into place. The entire adhesive
strip of the thermo container must be attached evenly to the pane.
Please note:The thermo container cannot be moved, once it has been pressed firmly into place.
2Unscrew top of Bio CO
2
bottle, open hinged lid and remove starter capsule. Remove green half of capsule by pulling carefully upwards.
Pour contents of the starter capsule into the CO
2
bottle together with the empty capsule halves.
3Fill CO
2
bottle up to marking (arrows) with tap water at a temperature of 20 to 25 °C (not over 25 °C!). Screw bottle top firm.
Note:Do not remove the white micro-filter in the hose connector of the top.
4Break off or cut off hinged lid.
5Pour tap water into bubble counter until it is 3/4 full.
TIP: For this purpose, submerge the bubble counter in upright position and tap gently on the lid.
6Use the short hose to connect the CO
2
bottle to the long tube of the bubble counter, fit hose firmly.
7Fit long hose to the 2nd connector (without tube) of the bubble counter.
8Place CO
2
bottle together with the connected bubble counter into the thermo container from above.
9Place top on thermo container. Align bubble counter so that it fits into the recess provided in the top.
10Rinse Mini-Flipper with warm tap water (no detergents!).
11Fit CO
2
supply hose firmly to hose connector of the Mini-Flipper.
12Choose a spot in the aquarium which is as dark as possible (to prevent algae growth) and where the water movement is good. Fix
Flipper in the aquarium in vertical position, at least 5 cm below the surface of the water.
When the system is applied correctly, CO
2
production will begin within 24-48 hours and at a rate of 6-10 bubbles per minute your aqua-
rium will be supplied with CO
2
for at least 30 days. The running-in period for the Flipper is approx. 2 days.A biofilm will form
over this period, enabling the CO
2
bubbles to pass freely through the device.
Changing the CO
2
bottle
When bubbles no longer issue from the Mini-Flipper, this indicates that the CO
2
bottle is empty. Proceed as follows:
•Remove CO
2
bottle from thermo container and disconnect hose from bottle top.
•Activate and connect new Bio CO
2
bottle.
The contents of the used CO
2
bottle can be disposed of via the sewerage system.
Cleaning the CO
2
Mini-Flipper
•Remove collector. Place Mini-Flipper flat in your hand so that the suction clips are pointing to the right. The open side (collector base)
is pointing upwards. Slide front side panel of the Flipper upwards by approx. 2 cm.햿
•Fold out side panel. Take out CO
2
hose, do not pull out. Clean all parts with water and soft brush. Do not use any detergents. Reassemble
Mini-Flipper via the reverse procedure. Insert CO
2
hose back in the side panel such that the end is located at the bottom stop. 헀
What if ... – Troubleshooting
Special information
Shelf life in unopened condition: Bottle contents approx. 5 years; starter capsules: approx. 12 months at 20 °C, approx. 19 months at
10 °C. Consequently, please store Bio CO
2
bottles in cool and dry conditions. Protect from sunlight, heat and frost!
Important:
•Should larger quantities of the bottle contents accidentally enter into the aquarium water during operation of the Bio CO
2
fertilizer
system, this may cloud the water and lead to oxygen deficiency. In this case, part of the water should be replaced immediately and the
fertilizer system should be checked for correct functioning. For this reason, do NOT fill the CO
2
bottle beyond the marking (arrows)!
Always use the thermo container in its support, to prevent it from falling over!
•Always keep CO
2
bottle out of the reach of children and in an upright position!
Spare parts (available from specialist retailers)
3004 Bio CO
2
bottle3071CO
2
Mini-Flipper
15575 starter capsules1515 2 Longlife suction clips, green
Set CO
2
de fertilisation des plantes Bio 120
Fumure biologique au CO
2
pour aquariums de 80 cm (80-120 l).
Avec gel de contrôle et mini-Flipper.
Explications
햲Récipient thermique햵Compte-bulles
햳Dépôt de réserve de CO
2
bio avec capsule de démarrage햶Flexible CO
2
long (compte-bulles - Flipper)
햴Flexible CO
2
court (dépôt de réserve - compte-bulles)햷Diffuseur CO
2
Mini-Flipper
Structure et raccordement
1Fixez le récipient thermique à un endroit de l’aquarium aisément accessible. Détachez le film protecteur des bandes adhésives. Collez le
récipient thermique en hautde l’aquarium, à la verticale, sur une vitre propreet dégraisséeet appuyez fermement. Tout le pourtour du
récipient thermique doit être uniformément plaqué sur la vitre.
Important:Une fois que vous aurez appuyé, vous ne pourrez plus déplacer le récipient thermique.
2Dévissez le couvercle du dépôt de réserve de CO
2
bio, ouvrez le couvercle rabattable et prélevez la capsule de démarrage. Retirez la
moitié verte de la capsule prudemment vers le haut. Versez le contenu de la capsule et les moitiés vides dans le dépôt de réserve.
3Remplissez le dépôt de réserve jusqu’au trait de marquage (flèche) avec de l’eau de distribution entre 20 et 25°C (pas plus de 25°C!).
Revissez fermement le couvercle. CONSEIL :
N’enlevez pas le micro-filtre blanc du raccord pour flexible du couvercle.
4Détachez ou découpez le couvercle rabattable.
5Remplir le compte-bulles à trois quarts d'eau de distribution.
Conseil : Plongez le compte-bulles à la verticale dans l’eau et frappez légèrement sur le couvercle
6Raccordez le dépôt de réserve à l’aide du flexible court au long tube du compte-bulles, placez le flexible fermement.
7Raccordez le flexible long au second raccord (sans tube) du compte-bulles.
8Placez le dépôt de réserve avec le compte-bulles raccordé dans le récipient thermique (par le haut)
9Placez le couvercle sur le récipient thermique. Orientez le compte-bulles de sorte à ce qu’il s’encastre dans le logement du couvercle
prévu à cet effet.
10Rincez le mini-Flipper à l’eau chaude de distribution (n’utilisez pas de produit de nettoyage!)
11Placez fermement le flexible d’alimentation en CO
2
sur le raccord du mini-Flipper.
12Choisissez dans l’aquarium un emplacement le plus sombre possible (afin d’éviter la formation d’algues) avec un bon brassage d’eau.
Fixez le Flipper dans l’aquarium à la verticale
, à 5 cm au moins en dessous du niveau de l'eau.
Si les conditions d’utilisation sont respectées, la production de CO
2
commence dans un délai de 24 à 48 heures et alimente votre aquarium
pendant au moins 30 jours à un réglage de 6-10 bulles par minute. Le temps de rodage du Flipper est d'environ deux jours. Un
film biologique se forme dans l’intervalle, ce qui permet aux bulles de CO
2
de passer sans obstacle.
Changer le dépôt de réserve de CO
2
bio
Si aucune bulle n’apparaît plus dans le mini-Flipper, c’est le signe que le dépôt de réserve est épuisé. Dans ce cas:
•Retirez le dépôt de réserve du récipient thermique et ôtez le flexible du couvercle.
•Démarrez un nouveau dépôt de réserve de CO2 bio et raccordez-le.
Vous pouvez jeter le contenu du dépôt de réserve usagé dans les canalisations domestiques.
Nettoyage du diffuseur CO
2
Mini-Flipper
•Enlever le collecteur. Poser le Mini-Flipper dans la main de sorte à ce que les ventouses soient tournées vers la droite. Le côté ouvert
(logement du collecteur) est dirigé vers le haut. Déplacez d’environ 2 cm vers le hautla face latérale avant.햿
•
Plier la face latérale vers l'extérieur. Enlever le tuyau CO
2
, sans tirer dessus. Nettoyer tous les éléments avec de l'eau chaude et une
brosse douce, n'utiliser aucun produit d'entretien. Remonter le Flipper dans l'ordre inverse. Replacer le tuyau CO
2
dans la face
latérale de manière à ce que l'extrémité se trouve sur la butée inférieure.헀
Défauts et solutions - élimination des erreurs
Remarques particulières
Conservation dans son emballage fermé: contenu de la bouteille environ 5 ans ; capsules de démarrage : environ 12 mois à 20°C, envi-
ron 18 mois à 10°C. Privilégier donc la conservation du dépôt de réserve de CO
2
bio dans un endroit frais et sec. Protéger du soleil, de la
chaleur et du gel!
Attention !
•Si de grandes quantités du contenu de la bouteille venaient à se déverser dans l’aquarium pendant l’utilisation de l’installation de fumure CO
2
bio, cela
peut troubler l’eau et entraîner un manque d’oxygène. Dans ce cas, effectuez immédiatement un changement partiel de l’eau et vérifiez le bon fonc-
tionnement de l’installation de fumure. Conclusion: Ne PAS dépasser le marquage (flèche) du dépôt de réserve lors du remplissage! Toujours utiliser la
bouteille dans le récipient thermique afin d’éviter qu’elle ne se renverse!
•Veuillez conserver le dépôt de réserve de CO
2
bio à la verticale et hors de portée des enfants!
Pièces de rechange (disponibles dans les magasins spécialisés)
3004 Dépôt de réserve de CO
2
bio3071Diffuseur CO
2
Mini-Flipper
15575 capsules de démarrage1515 Ventouses Longlife, vertes, 2 pièces
CO
2
Pflanzen-Dünge-Set Bio 120
Biologische CO
2
-Düngung für 80 cm Aquarien (80-120 l).
Mit Control-Gel und Mini-Flipper.
Was ist was
햲Thermobehälter햵Blasenzähler
햳Bio CO
2
Vorrats-Depot mit Starterkapsel햶Langer CO
2
Schlauch (Blasenzähler - Flipper)
햴Kurzer CO
2
Schlauch (Vorrats-Depot – Blasenzähler)햷CO
2
Mini-Flipper
Aufbau und Anschluss
1Befestigen Sie den Thermobehälter an einer gut zugänglichen Stelle am Aquarium. Schutzfolie von Klebestreifen abziehen.
Thermobehälter obenam Aquarium, senkrechtan eine saubere, fettfreieScheibe ankleben und fest andrücken. Der Thermobehälter
muss rundherum gleichmäßig an der Scheibe anliegen.
Bitte beachten:Nach dem Andrücken lässt sich der Thermobehälter nicht mehr verschieben.
2Deckel vom Bio CO
2
Vorrats-Depot abschrauben, Klappdeckel öffnen und Starterkapsel herausnehmen. Grüne Kapselhälfte vorsichtig
nach oben abziehen. Inhalt der Starterkapsel und leere Kapselhälften in das Vorrats-Depot geben.
3Vorrats-Depot bis zum Markierungsstrich (Pfeile) mit 20 bis 25 °C warmem Leitungswasser füllen (nicht über 25 °C!). Deckel fest
zuschrauben. Hinweis:
Den weißen Mikro-Filter im Schlauchanschluss des Deckels nicht entfernen.
4Klappdeckel abbrechen oder abschneiden.
5Blasenzähler zu 3/4 mit Leitungswasser füllen.
TIPP: Blasenzähler dazu senkrecht unter Wasser tauchen und leicht auf den Deckel klopfen.
6Vorrats-Depot mit dem kurzem Schlauch an das lange Röhrchen des Blasenzählers anschließen, Schlauch fest aufstecken.
7Den langen Schlauch auf den 2. Anschluss (ohne Röhrchen) des Blasenzählers stecken.
8Vorrats-Depot zusammen mit dem angeschlossenen Blasenzähler von oben in den Thermobehälter stellen.
9Deckel auf Thermobehälter setzen. Blasenzähler dabei so ausrichten, dass er in die vorgesehene Aussparung des Deckels passt.
10Mini-Flipper mit warmem Leitungswasser (ohne Reinigungsmittel!) abspülen.
11CO
2
Zuleitungsschlauch auf den Schlauchanschluss des Mini-Flippers fest aufstecken.
12Im Aquarium eine möglichst dunkle Stelle (beugt Veralgung vor) mit guter Wasserbewegung wählen. Flipper senkrecht
, mindestens
5 cm unter dem Wasserspiegel im Aquarium befestigen.
Die CO
2
-Produktion beginnt bei richtiger Anwendung innerhalb 24-48 Stunden und versorgt Ihr Aquarium, bei 6-10 Blasen pro Minute,
mindestens 30 Tage mit CO
2
. Die Einlaufzeit des Flippers beträgt ca. 2 Tage. In dieser Zeit bildet sich ein Biofilm, der den CO
2
-Blasen
das ungehinderte Durchlaufen ermöglicht
Bio CO
2
Vorrats-Depot wechseln
Wenn im Mini-Flipper keine Blasen mehr austreten, ist das Vorrats-Depot verbraucht, dann:
•Vorrats-Depot aus Thermobehälter nehmen und Schlauch vom Deckel abziehen.
•Neues Bio CO
2
Vorrats-Depot starten und wieder anschließen.
Der Inhalt des verbrauchten Vorrats-Depots kann über die Hauskanalisation entsorgt werden.
CO
2
Mini-Flipper reinigen
•Auffangwanne abziehen. Mini-Flipper so in die Hand legen, dass die Sauger nach rechts zeigen. Die offene Seite (Sitz der
Auffangwanne) zeigt nach oben. Vordere Seitenwand des Flippers ca. 2 cm nach oben verschieben. 햿
•Seitenwand herausklappen. CO
2
-Rohr herausnehmen, nicht herausziehen. Alle Teile mit warmem Wasser und weicher Bürste reinigen,
keine Reinigungsmittel verwenden. Flipper in umgekehrter Reihenfolge wieder zusammenbauen. CO
2
-Rohr wieder so in Seitenwand ein-
legen, dass sich das Ende am unteren
Anschlag befindet. 헀
Was tun wenn... - Fehlerbehebung
Besondere Hinweise
Haltbarkeit in ungeöffnetem Zustand: Flascheninhalt ca. 5 Jahre; Starterkapseln: ca. 12 Monate bei 20 °C, ca. 18 Monate bei 10 °C.
Deshalb Bio CO
2
Vorrats-Depot bitte kühl und trocken lagern. Vor Sonne, Hitze und Frost schützen!
Achtung!
•Sollten während des Betriebs der Bio CO
2
-Düngeanlage versehentlich größere Mengen des Flascheninhalts ins Aquarium gelangen, so
kann dies zu Wassertrübung und Sauerstoffmangel führen. In diesem Fall sofort entsprechenden Teilwasserwechsel durchführen und
sachgerechte Funktion der Düngeanlage überprüfen. Deshalb: Vorrats-Depot NICHT über Markierungsstrich (Pfeile) füllen! Flasche stets
in Thermobehälter betreiben, um ein Umfallen zu verhindern!
•Bio CO
2
Vorrats-Depot für Kinder unerreichbar und immer stehend aufbewahren!
In base alla data di acquisto. Sempre gratuito, annulla l'iscrizione in qualsiasi momento.
M: QW-35-FL
Fai una Domanda
0/1000
Consigli BIO-CO2 Bio 120?
SìNo
0
Lukas Weber
5 mesi fa
Questo sistema CO2 è adatto per acquari di medie dimensioni e migliora davvero la crescita delle piante?
0
Manual.ly
5 mesi fa
Sì, questo sistema è progettato per acquari di medie dimensioni e funziona bene sia per i principianti che per gli esperti. Gli utenti hanno confermato una crescita delle piante significativamente migliore. Offre livelli stabili di CO2 per piante acquatiche sane.
M: qwen/qwen3.5-flash-20260224
M: qwen/qwen3.5-flash-20260224
Domande
frequenti
A
Each Bio CO2 bottle is designed to supply your aquarium with CO2 for at least 30 days once activated. This ensures consistent fertilization levels for your aquatic plants without frequent replacements, provided the system is set up correctly according to the specified bubble rate targets.
Questa risposta è utile?
A
The set is specifically designed for 80 cm aquaria with a water volume ranging from 80 to 120 liters. This size compatibility ensures that the biological production of carbon dioxide matches the needs of plants within tanks of this specific capacity range effectively.
Questa risposta è utile?
A
Once the system is applied correctly, CO2 production will begin within 24 to 48 hours. The Mini-Flipper diffuser also has a running-in period of approximately two days for a biofilm to form, which enables bubbles to pass freely through the device for optimal absorption.
Questa risposta è utile?
A
Unscrew the top of the Bio CO2 bottle and remove the starter capsule. Pour the contents of the capsule into the CO2 bottle along with tap water at a temperature of 20 to 25 degrees Celsius. Do not remove the white micro-filter in the hose connector on the bottle top during this process.
Questa risposta è utile?
A
If bubbles are not visible after 48 hours, check if the bottle is too cool or if connections are leaking. You can restart the production with a 2nd capsule. Ensure the Mini-Flipper is mounted vertically and clean any blockages like algae or sludge from the internal parts of the diffuser.
Questa risposta è utile?
A
No, do not use detergents when cleaning the CO2 Mini-Flipper. Use warm tap water and a soft brush to clean all parts. Detergents may leave residues that are harmful to the aquatic environment or interfere with the biological processes within the aquarium water.
Questa risposta è utile?
A
Keep the bottle contents out of direct sunlight, heat, and frost. Unopened bottle contents last about 5 years. Starter capsules last about 12 months at 20 degrees Celsius or up to 18 months at 10 degrees Celsius. Always store in cool, dry, and upright positions away from children.
Questa risposta è utile?
M: qwen/qwen3.5-flash-20260224
Vantaggie
Svantaggi
Vantaggi
Biological system requires no electricity or expensive equipment for CO2 generation
Effective for 80 to 120 liter aquariums with a duration of at least 30 days per bottle
Includes a Mini-Flipper diffuser for efficient bubble dispersion and reduced algae risk
Simple setup process with clear instructions for aquarium maintenance and safety
Long shelf life for stored components when kept in cool and dry conditions
VS
Svantaggi
Requires manual mixing of starter capsules and water for activation before use
Sensitive to temperature changes, needing a range of 20 to 25 C for optimal function
Overfilling the bottle can cause liquid spills leading to oxygen deficiency in the tank
The flipper requires a two-day running-in period before efficient gas flow is achieved
Capsules have a limited lifespan of 12 to 18 months depending on storage temperature
M: qwen/qwen3.5-flash-20260224
Prodotto
Specifiche
Applicazione
Fornitura CO2, Fertilizzazione delle piante
Tipo
Sistema di fertilizzazione CO2 (Serbatoio con isolamento termico, Capsule di avvio, Contatore di bolle, Control-Gel, Non regolato, con dispositivo di dosaggio CO2 Mini-Flipper), Set completo, BIO-CO2
Specifiche
Durata operativa di circa 30 giorni
Adatto per
Acqua dolce, Acquario, 80,00-120,00 L
Consumabili
BIO-CO2 Control-Gel
Caratteristiche
Include tubo CO2
M: qwen/qwen3.5-flash-20260224
Descrizione del prodotto
Descrizione
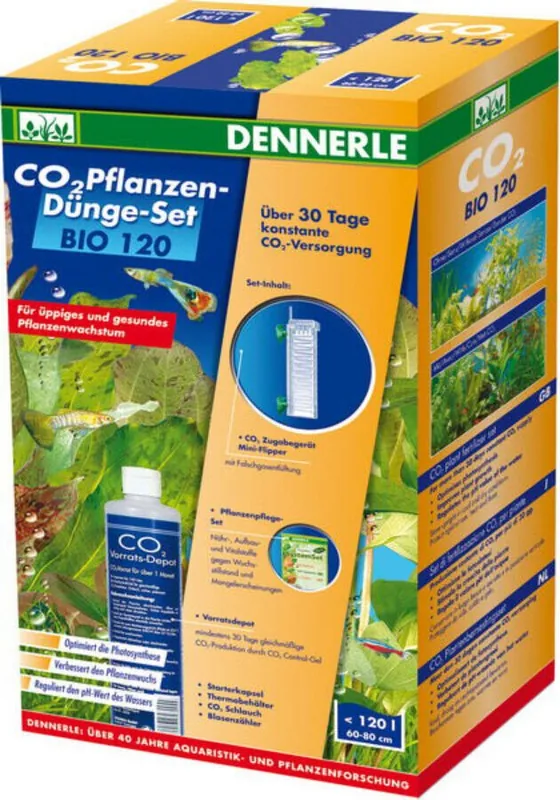
Enhancing Your Planted Aquarium with the Dennerle BIO-CO2 Plant Fertilizer Set Bio 120
Achieving lush growth in your aquarium can be challenging without adequate carbon dioxide. The Dennerle BIO-CO2 Plant Fertilizer Set Bio 120 offers a reliable biological solution for plant enthusiasts. Designed specifically for 80 cm aquaria ranging from 80 to 120 liters, this system ensures consistent CO2 supply without complex equipment or electricity.
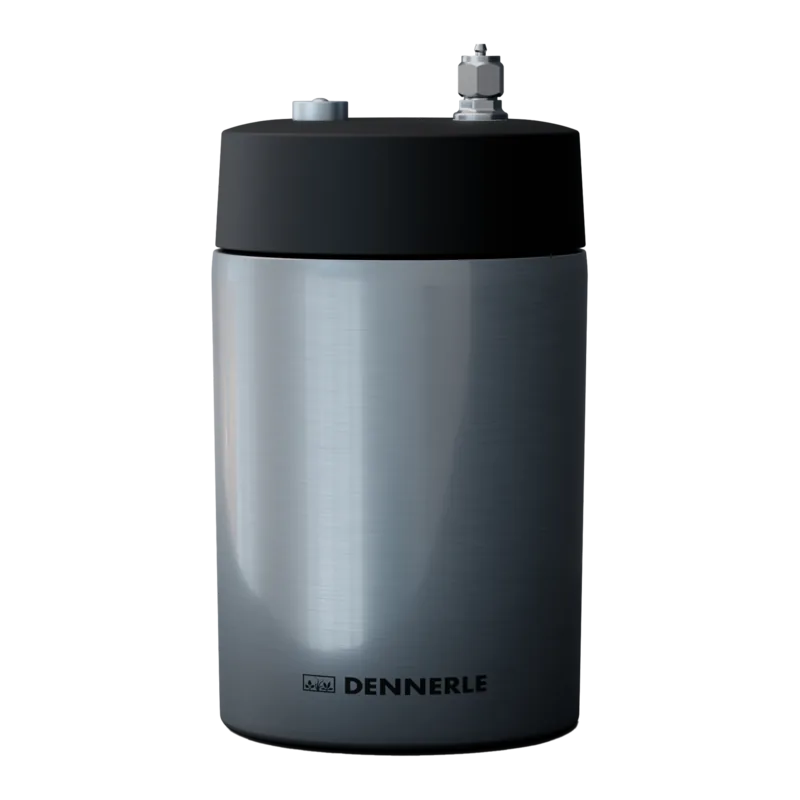
The core of this setup relies on biological fermentation. You mix a starter capsule with water and yeast in a special bottle. This reaction produces CO2 bubbles over time. The system includes a thermo container to maintain optimal temperature for the reaction. A bubble counter allows you to monitor the production rate, ensuring it stays within the recommended 6 to 10 bubbles per minute. The Mini-Flipper diffuser creates fine bubbles for better absorption by plants. The bubble counter and flipper are key components for efficiency.
Setting up the system is straightforward according to guidelines. First, attach the thermo container to a clean, grease-free part of the aquarium glass using the adhesive strip. Ensure the strip is fully adhered. Next, prepare the bottle by removing the capsule lid and pouring contents into the water-filled bottle. Fill only up to the markings with tap water between 20 and 25 degrees Celsius. Assemble the hoses connecting the bottle to the counter and finally to the flipper. Place everything inside the thermo box and align the bubble counter correctly.
Once activated, CO2 production begins within 48 hours. Each bottle lasts for at least 30 days. The Mini-Flipper requires a two-day running-in period for a biofilm to form, which prevents algae blockage. Position the flipper vertically at least 5 cm below the surface in a spot with good water movement. Maintenance involves regular cleaning of the flipper with warm water and no detergents. If bubbles stop, check for leaks or cool bottles. Troubleshooting is essential for continuous operation.
Storage is crucial for longevity. Unopened bottles last five years, while starter capsules last between 12 to 18 months depending on temperature. Keep supplies away from children and direct sunlight. Avoid overfilling the bottle to prevent liquid spills that could cause oxygen deficiency in the tank. If liquid enters the tank, replace water immediately to prevent safety risks.
This system is perfect for beginners seeking simplicity. It balances cost and performance effectively. By following proper setup and maintenance routines, your aquarium plants will thrive with stable fertilization levels. Spare parts are available for replacement bottles and flipper clips if needed. Codes like 3004 and 3071 ensure compatibility.




Lukas Weber
5 mesi fa
Questo sistema CO2 è adatto per acquari di medie dimensioni e migliora davvero la crescita delle piante?
Manual.ly
5 mesi fa
Sì, questo sistema è progettato per acquari di medie dimensioni e funziona bene sia per i principianti che per gli esperti. Gli utenti hanno confermato una crescita delle piante significativamente migliore. Offre livelli stabili di CO2 per piante acquatiche sane.