
Vitavia Ida 900 Manuale
Manuale PDF · 48 Pagine
Italiano



Controllo rapido
Risposta errata, riprova.
Chatta con il manuale del tuo Vitavia Ida 900 utilizzando l'IA
Ottieni risposte istantanee dall'IA dal manuale del tuo Vitavia Ida 900
Chiedi qualsiasi cosa sul Vitavia Ida 900. Le risposte provengono da questo manuale, con le pagine di riferimento.
Ida 900 Programma di manutenzione
Lavare accuratamente la serra occasionalmente utilizzando un detersivo delicato. Assicurarsi che il detersivo non reagisca aggressivamente con le clip di alluminio o vetro.
Pulire regolarmente le guide superiori e inferiori della porta per evitare l'accumulo di detriti.
Fai una Domanda
Consigli Ida 900?
Sì NoDomande frequenti
La configurazione addossata consente di risparmiare spazio e utilizza una parete esistente come supporto. Aiuta anche la serra a risultare più riparata, cosa utile nei giardini ventosi o nelle aree esterne più ristrette.
Questa risposta è utile?
Sì, ma solo se viene ancorata correttamente e installata su una base stabile. Le istruzioni sottolineano un fissaggio sicuro, soprattutto nei luoghi esposti o ventosi, per mantenere la struttura al sicuro.
Questa risposta è utile?
Sì. Include una finestrella di ventilazione sul tetto, che aiuta a far uscire il calore e a migliorare il ricambio d'aria. Questo rende più facile gestire temperatura e umidità nei periodi più caldi.
Questa risposta è utile?
Sì, la porta può essere posizionata in qualsiasi sezione anteriore. Questo offre una certa flessibilità durante il montaggio e consente di adattare la disposizione al tuo giardino.
Questa risposta è utile?
Il testo fa riferimento al vetro trasparente e indica anche che possono essere utilizzate lastre in policarbonato. Il metodo di vetratura esatto dipende dal materiale e dallo spessore scelti.
Questa risposta è utile?
Controlla che tutti i componenti siano inclusi, prepara gli strumenti giusti e assicurati che la base sia in piano e quadrata. Si raccomanda anche l'uso di dispositivi protettivi quando si maneggiano vetro o parti metalliche.
Questa risposta è utile?
Puliscila occasionalmente con un detergente delicato, evita prodotti chimici aggressivi su alluminio o clip e libera regolarmente i binari della porta. In inverno, controlla il carico della neve e tieni le prese d'aria chiuse in caso di vento forte.
Questa risposta è utile?
Vantaggi e Svantaggi
Vantaggi

- Il design addossato salvaspazio usa una parete come supporto e si adatta bene ai giardini più piccoli.
- La struttura in alluminio è resistente e richiede poca manutenzione per l'uso esterno.
- La vetratura da 4 mm aiuta a creare uno spazio luminoso per la coltivazione delle piante.
- La finestrella sul tetto e la porta scorrevole migliorano il ricambio d'aria e l'accesso quotidiano.
Svantaggi

- Il montaggio è dettagliato e dà il meglio con due persone.
- È necessaria una base piana e quadrata con un ancoraggio sicuro.
- La gestione del vetro comporta rischi per la sicurezza e richiede dispositivi protettivi.
- Alcuni strumenti e materiali di fissaggio non sono inclusi nella confezione.
Prodotto Specifiche
Vetrata
Policarbonato 4mm (lastre a doppia parete)
Telaio
Alluminio
Colore
argento
Superficie
0,9 m²
Caratteristiche speciali
Lucernario
Porta
Porta scorrevole
Dimensioni (LxPxA)
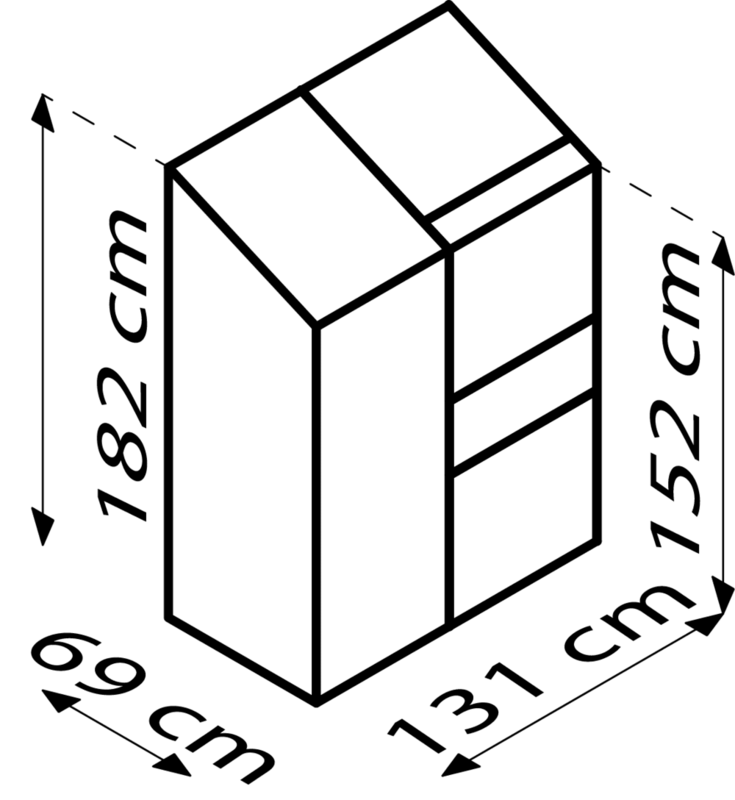
1310x690x1820mm
Descrizione del prodotto Descrizione
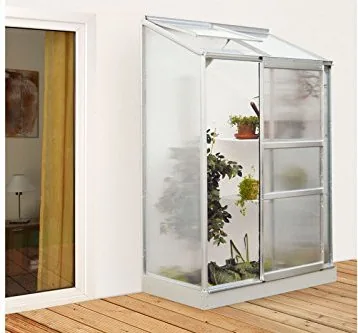
Serra addossata Vitavia Ida 900 HKP 4mm in alluminio
Il Manuale della serra addossata Vitavia Ida 900 HKP 4mm in alluminio si riferisce a una serra compatta da montare a parete, progettata per giardinieri che desiderano uno spazio di coltivazione pratico senza occupare l'intero giardino. La configurazione addossata sfrutta in modo intelligente una parete esterna, aiutando la struttura a rimanere riparata pur catturando molta luce solare per piantine, erbe aromatiche e piante stagionali.
Una serra salvaspazio per la coltivazione quotidiana
Ciò che rende interessante questo modello è il suo equilibrio tra semplicità e funzionalità. La struttura in alluminio offre una costruzione pulita e durevole, pensata per resistere bene alle condizioni esterne, mentre il vetro da 4 mm favorisce un interno luminoso per la crescita delle piante. Il design include anche una porta scorrevole e una finestrella di ventilazione sul tetto, entrambe importanti per il comfort, il ricambio d'aria e l'accesso quotidiano. Per i giardinieri che apprezzano un allestimento ordinato, la struttura appare efficiente piuttosto che ingombrante.
Questa serra è chiaramente pensata con la stabilità in mente. Le istruzioni sottolineano la necessità di una base quadrata e in piano e di un ancoraggio sicuro, un chiaro segno che il prodotto è destinato a un uso serio, non solo decorativo. Una volta installata correttamente, può diventare un punto affidabile per coltivare le piante durante le diverse stagioni. Il concetto da parete contribuisce anche a creare un microclima più protetto, soprattutto nei giardini esposti dove il vento può essere un problema.
Progettata pensando alla pratica del giardinaggio
Le istruzioni di montaggio suggeriscono un processo attento e graduale, che riflette la robustezza della struttura. Mostrano anche che la serra deve essere assemblata con attenzione ai dettagli: controllare tutti i componenti, usare gli strumenti giusti e maneggiare vetro o policarbonato in sicurezza. Può sembrare impegnativo, ma significa anche che il risultato finale è progettato per essere solido e duraturo.
Per i giardinieri che amano una coltivazione organizzata, questa serra offre un buon mix di ventilazione, accesso e protezione dagli agenti atmosferici. La finestra sul tetto aiuta a gestire il calore nelle giornate di sole, mentre la porta scorrevole rende l'ingresso comodo. In breve, è una soluzione compatta per chi vuole prolungare la stagione e offrire alle piante un ambiente più controllato.
Note
- Installare su una base piana e quadrata per la massima stabilità.
- Si raccomandano due persone per il montaggio.
- Ancorare la serra saldamente, soprattutto nelle zone ventose.
- Mantenere puliti i binari della porta e le parti di ventilazione per un uso più fluido.
Riepilogo
La serra addossata in alluminio Vitavia Ida 900 HKP 4mm è una struttura di coltivazione salvaspazio con un telaio resistente, una ventilazione pratica e un design pensato per la cura costante delle piante. È adatta ai giardinieri che desiderano una serra compatta, adattata alla parete, robusta, utile e pronta per una coltivazione regolare.
Cerca di 67.706 Manuali online


Digita il marchio o il modello