

Vitavia Comet 2500 Manuale
Manuale PDF · 44 Pagine
Italiano



Controllo rapido
Risposta errata, riprova.
Chatta con il manuale del tuo Vitavia Comet 2500 utilizzando l'IA
Ottieni risposte istantanee dall'IA dal manuale del tuo Vitavia Comet 2500
Chiedi qualsiasi cosa sul Vitavia Comet 2500. Le risposte provengono da questo manuale, con le pagine di riferimento.
Comet 2500 Programma di manutenzione
Lavare accuratamente la serra occasionalmente con un detergente delicato o neutro. Assicurarsi che il prodotto di pulizia non reagisca in modo aggressivo con l'aluminium o le clip di fissaggio del vetro.
Assicurarsi che le guide superiori e inferiori delle porte vengano pulite regolarmente per evitare l'accumulo di detriti.
Rimuovere regolarmente foglie e sporco dal tetto per prevenire accumuli.
Controllare costantemente se l'ancoraggio nel terreno tiene saldamente.
Durante l'inverno, rimuovere l'apri-finestra automatico (se presente) e conservarlo a temperature superiori a 0°C per prevenire danni da gelo.
Fai una Domanda
Consigli Comet 2500?
Sì NoDomande frequenti
Necesitará destornilladores (plano y cruz PH2), una llave de vaso de 10 mm, una llave combinada, un cuchillo, una regla de medida, un nivel de burbuja y un taladro accu con torque ajustable. Tambien son obligatorias gafas protectoras y guantes.
Questa risposta è utile?
No, nunca debe construir este invernadero en suelo arenoso porque no puede sostener los pines de anclaje de forma segura. Debe usar una base de concreto o una base de acero galvanizado anclada profundamente en el suelo.
Questa risposta è utile?
El lado resistente a los rayos UV esta marcado por una pelicula o impresion. Mantenga esta pelicula puesta hasta que el panel este completamente posicionado dentro del invernadero para evitar arañazos. Retire la pelicula solo despues de completar la instalacion.
Questa risposta è utile?
Si, el policarbonato de 4 mm proporciona buen aislamiento. Sin embargo, debe limpiar la nieve pesada del techo regularmente para evitar el colapso y considere calentar la estructura si mantiene plantas durante el invierno.
Questa risposta è utile?
Se recomienda encarecidamente que dos personas ensamblen el invernadero. Manejar perfiles de aluminio grandes y paneles de vidrio solo puede ser dificil e inseguro debido a los bordes afilados y el peso.
Questa risposta è utile?
Vantaggi e Svantaggi
Vantaggi

- Marco de aluminio duradero resiste el óxido y la corrosion
- Policarbonato de 4 mm proporciona aislamiento superior y difusion de luz
- La puerta corrediza asegura un acceso conveniente para tareas de jardin
- Las ventanas del techo permiten un control efectivo de temperatura y humedad
- Manual completo simplifica el proceso de ensamblaje
Svantaggi

- Requiere una base perfectamente nivelada y cuadrada para estabilidad
- Debe estar anclado firmemente para resistir altas velocidades de viento
- Perforar agujeros es necesario para adjuntar paneles a las cornisas
- Silicona selladora no se incluye pero se recomienda para impermeabilizacion
- Carga pesada de nieve requiere limpieza regular para prevenir danos
Prodotto Specifiche
Vetro
Policarbonato 4 mm (lastre a camera d'aria)
Telaio
Alluminio
Colore
Argento
Superficie
0,23 m²
Caratteristiche
Finestra per tetto, grondaia, bloccabile
Porta
Porta scorrevole
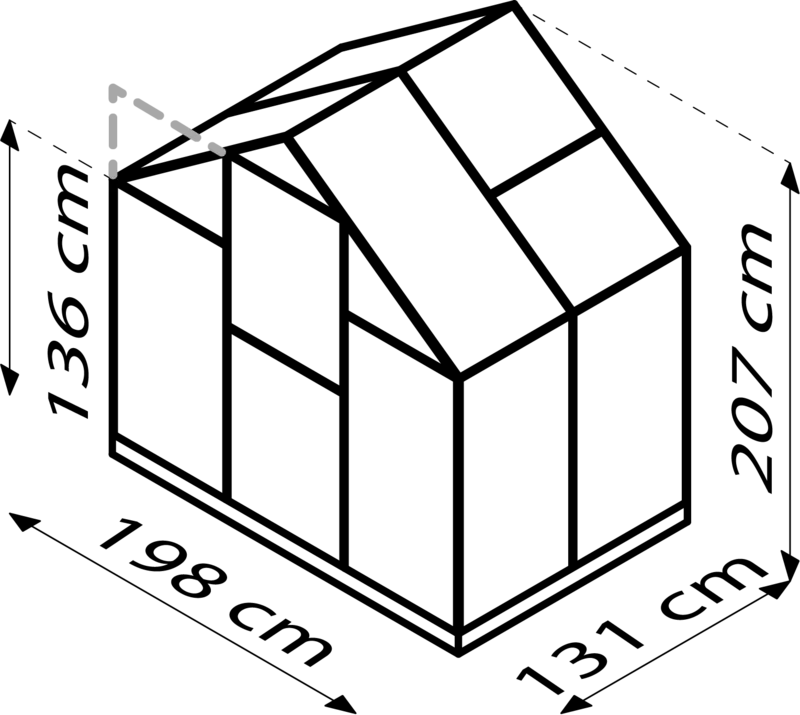
Dimensioni (LxPxH)
195x131x197 cm
Peso
22,72 kg
Descrizione del prodotto Descrizione
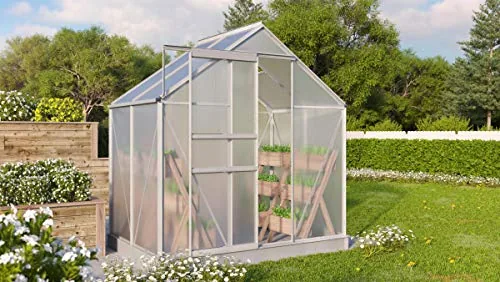
Vitavia Comet 2500 HKP 4mm Greenhouse alu: Su Santuario de Jardin Perfecto
Crear un jardin próspero requiere el ambiente adecuado, y la Vitavia Comet 2500 HKP 4mm Greenhouse alu ofrece una solucion excepcional para los entusiastas de las plantas. Esta estructura robusta combina un marco de aluminio duradero con acristalamiento de policarbonato de alta calidad para asegurar que sus plantas reciban luz optima mientras estan protegidas de condiciones climaticas severas. La guia manual le guia a traves de un proceso de ensamblaje sencillo, haciendolo accesible incluso para aquellos con experiencia limitada en bricolaje.
Diseñado con eficiencia en mente, este invernadero cuenta con un interior espacioso que maximiza el potencial de cultivo dentro de una huella compacta. Los paneles de policarbonato multi-pared de 4 mm proporcionan un excelente aislamiento, reteniendo el calor durante los meses mas frios mientras difunden la luz solar para evitar quemar el follaje delicado. El marco de aluminio esta tratado para resistir la corrosion, asegurando longevidad incluso en ambientes humedos o costeros. Una puerta corrediza permite un acceso facil, mientras que las ventanas del techo facilitan la ventilacion natural, crucial para mantener una circulacion de aire saludable y prevenir enfermedades fúngicas. El ensamblaje comienza seleccionando una ubicacion soleada y protegida del viento. La base debe estar perfectamente nivelada y cuadrada para asegurar la integridad estructural. Ya sea que elija una base de concreto o un accesorio de acero galvanizado, el anclaje adecuado es esencial para resistir vientos fuertes. La guia incluida detalla cada paso, desde conectar elementos laterales hasta instalar las ventanas del techo y los paneles de acristalamiento. Las precauciones de seguridad se enfatizan a lo largo, recordando a los usuarios usar equipo de proteccion cuando se manipulan vidrio y bordes metalicos afilados. Con su diseño elegante y funciones funcionales, la Vitavia Comet 2500 HKP se presenta como una inversion confiable para jardineros serios que buscan extender su temporada de cultivo durante todo el año.
Cerca di 67.706 Manuali online


Digita il marchio o il modello