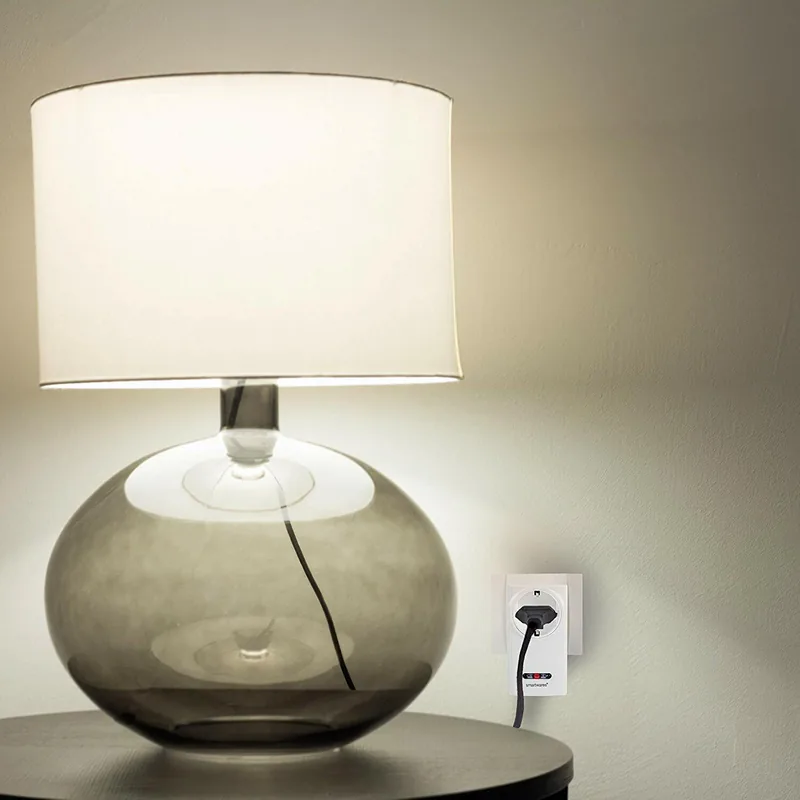
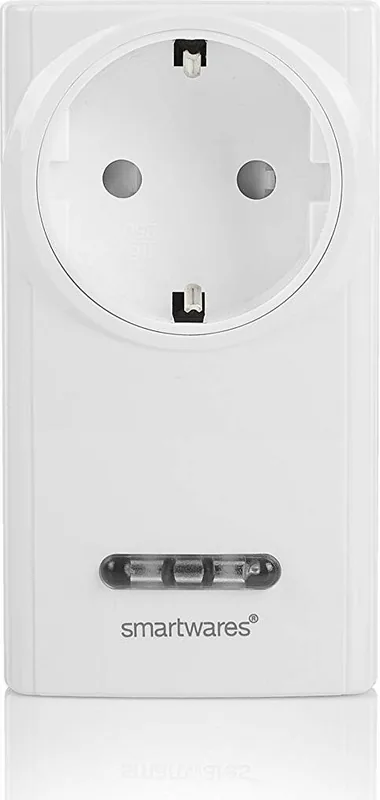
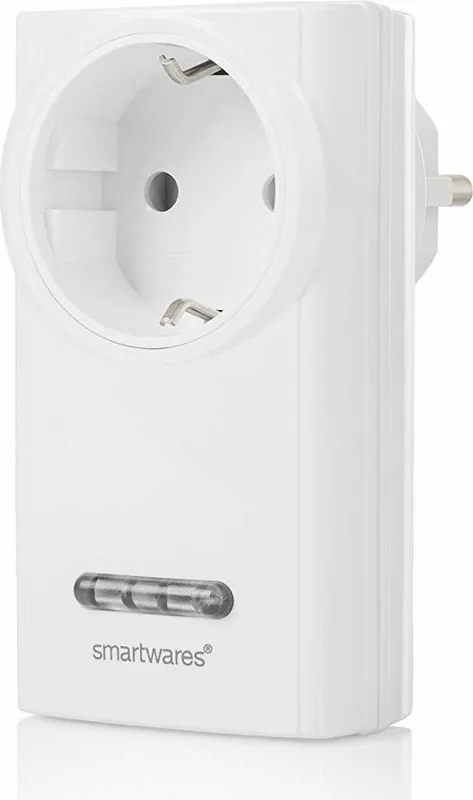
• Plaats de ontvanger (SH5-RPS-36A) in het stopcontact
1
.
De ontvanger met een zender koppelen of ontkoppelen
a. Druk 3 seconden op de knop op de ontvanger en laat deze vervolgens los
2
. Bij deze handeling
gaat de LED knipperen
3
. Uw ontvanger bevindt zich nu in de koppelmodus.
Let op! De LED mag pas knipperen na het loslaten. Als de LED gaat knipperen tijdens indrukken dan
wordt er niet gekoppeld.
b. Druk op “I” / ”ON” op de zender om deze te koppelen. Bij deze handeling gaat de LED op de
ontvanger branden. Druk op “0” / “OFF” op de zender om deze te ontkoppelen. Bij deze handeling
dooft de LED op de ontvanger.
Let op! Het is mogelijk om een ontvanger aan meerdere zenders te koppelen, zes
geheugenplaatsen zijn beschikbaar.
Let op! Wanneer de LED op de ontvanger snel blijft knipperen, zijn alle geheugenplaatsen vol.
Ontkoppel dan één zender of maak alle koppelingen ongedaan.
De ontvanger gereed maken
• Sluit een gewenst apparaat aan op de ontvanger en zorg ervoor dat het gewenste apparaat aan
staat
4
. De ontvanger is nu gereed voor gebruik.
Een ontvanger bedienen
a. Druk op “I” / ”ON” op de zender om de ontvanger in te schakelen.
b. Druk op “0” / “OFF” op de zender om de ontvanger uit te schakelen.
Alle koppelingen ongedaan maken
a. Druk 10 seconden op de knop op de ontvanger
5
.
b. Bij deze handeling gaat de LED knipperen.
c. Zodra de LED dooft zijn alle koppelingen ongedaan gemaakt.
Spanningsvrij maken: neem de ontvanger uit de contactdoos.
NL
FR
ES
Flash
3 sec
10 sec
1
2
3
4
5
Preparation for use
• Insert the receiver (SH5-RPS-36A) into the wall outlet
1
.
Pairing/disconnecting the receiver with/from a transmitter
a. Press and hold the button on the receiver for 3 seconds and then release it
2
. During this
operation the LED starts to blink
3
. Your receiver is now switched into the pairing mode.
Attention: the LED should blink only after releasing the button. If the LED starts to blink while
holding the button, there will be no pairing.
b. Press the “I” / ”ON” button on the transmitter to pair it with a receiver. During this operation the LED
on the receiver will light up. Press the “0” / “OFF” button on the transmitter to disconnect it from a
receiver. During this operation the LED on the receiver turns o.
Attention: it is possible to pair a receiver with multiple transmitters, six memory positions are
available.
Attention: When the LED on the receiver keeps blinking rapidly, the memory is full. Disconnect one
transmitter or disconnect all links.
Preparing the receiver
• Connect a desired device to the receiver and make sure the desired device is switched on
4
. Now,
the receiver is ready for use.
Operating receivers
a. Press the “I” / ”ON” button on the transmitter to turn on the receiver.
b. Press the “0” / “OFF” button on the transmitter to turn o the receiver.
Disconnecting all links
a. Press and hold the button on the receiver for 10 seconds
5
.
b. During this operation the LED starts to blink.
c. When the LED on the receiver turns o, all links will be disconnected.
Disconnecting from the mains: remove the receiver from the wall outlet.
DE
Benutzung vorbereiten
• Stecken Sie den Empfänger (SH5-RPS-36A) in die Steckdose
1
.
Verbindung/Trennung des Empfängers mit einem/von einem Transmitter
a. Drücken und halten Sie die Taste am Empfänger 3 Sekunden lang und lassen Sie sie wieder los
2
.
Während dieses Vorgangs beginnt die LED zu blinken
3
. Ihr Empfänger wurde jetzt in den
Verbindungsmodus geschaltet.
Achtung: Die LED darf erst nach der Freigabe blinken. Wenn die LED zu blinken beginnt, während
die Taste gedrückt wird, wird keine Verbindung aufgebaut.
b. Drücken Sie die „I“ / „EIN“-Taste am Transmitter, um ihn mit dem Empfänger zu verbinden. Während
dieses Vorgangs leuchtet die LED am Empfänger auf. Drücken Sie am Transmitter die „0“ / „AUS“-
Taste, um ihn vom Empfänger zu trennen. Bei diesem Vorgang erlischt die LED am Empfänger.
Achtung: Es ist möglich, einen Empfänger mit mehreren Transmittern zu verbinden, es sind sechs
Speicherstellen verfügbar.
Achtung: Wenn die LED am Empfänger weiterhin schnell blinkt, ist der Speicher voll. Trennen Sie
einen Transmitter oder trennen Sie alle Verbindungen.
Empfänger vorbereiten
• Schließen Sie das gewünschte Gerät am Empfänger an und schalten Sie es ein
4
. Jetzt, ist der
Empfänger betriebsbereit.
Bedienung der Empfänger
a. Drücken Sie die „I“ / „EIN“-Taste am Transmitter, um den Empfänger einzuschalten.
b. Drücken Sie die „O“ / „AUS“-Taste am Transmitter, um den Empfänger auszuschalten.
Pairing löschen (alle)
a. Drücken und halten Sie die Taste am Empfänger 10 Sekunden lang
5
.
b. Während dieses Vorgangs beginnt die LED zu blinken.
c. Wenn die LED am Empfänger erlischt, werden alle Verbindungen getrennt.
Abtrennen vom Netz: Ziehen Sie den Empfänger aus der Steckdose.
Préparation avant utilisation
• Branchez le récepteur (SH5-RPS-36A) sur la prise murale
1
.
Connecter/Déconnecter le récepteur à un émetteur
a. Maintenez le bouton du récepteur enfoncé pendant 3 secondes avant de le relâcher
2
. Pendant
cette opération, la DEL commence à clignoter
3
. Votre récepteur est à présent en mode de
connexion.
Attention : la DEL doit clignoter uniquement une fois le bouton relâché. Si la DEL commence à
clignoter lorsque le bouton est enfoncé, aucune connexion ne se produira.
b. Appuyez sur le bouton “I” / ”ON” de l’émetteur pour le connecter à un récepteur. Pendant cette
opération, la DEL sur le récepteur s’allumera. Appuyez sur le bouton “0” / “OFF” de l’émetteur pour le
déconnecter d’un récepteur. Pendant cette opération, la DEL du récepteur s’éteindra.
Attention : il est possible de connecter un récepteur à de multiples émetteurs, six positions de
mémoire sont possibles.
Attention : Lorsque la DEL du récepteur continue à clignoter rapidement, la mémoire est pleine.
Déconnecter un émetteur ou déconnecter tous les liens.
Préparation du récepteur
• Connectez un appareil voulu au récepteur et vérier que cet appareil est activé
4
. À présent, le
récepteur est prêt à être utilisé.
Utiliser les récepteurs
a. Appuyez sur le bouton “I” / “ON” de l’émetteur pour mettre le récepteur en marche.
b. Appuyez sur le bouton “0” / “OFF” de l’émetteur pour éteindre le récepteur.
Dissociation de tous les liens
a. Maintenez le bouton du récepteur enfoncé pendant 10 secondes
5
.
b. Pendant cette opération, la DEL commence à clignoter.
c. Lorsque la DEL du récepteur s’éteint, tous les liens seront déconnectés.
Débranchez I’appareil du secteur : débranchez le récepteur de la prise murale.
Preparación para el uso
• Introduzca el receptor (SH5-RPS-36A) en el enchufe de la pared
1
.
Conectar/desconectar el receptor a un transmisor
a. Presione y mantenga el botón del receptor durante 3 segundos y suéltelo
2
. Durante esta
operación el LED comenzará a parpadear
3
. El receptor pasará a modo conexión.
Atención: el LED solamente debe parpadear tras soltar el botón. Si el LED comienza a parpadear
mientras pulsa el botón la conexión no se realizará.
b. Pulse el botón “I” / “ON” del transmisor para conectarlo a un receptor. Durante esta operación el
LED en el receptor se encenderá. Pulse el botón “0” / “OFF” del transmisor para desconectarlo de un
receptor. Durante la operación se apagará el LED del receptor.
Atención: es posible conectar un receptor a múltiples transmisores, dispone de seis posiciones
de memoria.
Atención: Cuando el LED del receptor siga parpadeando rápidamente, la memoria estará llena.
Desconecte un transmisor o desconecte todas las conexiones.
Hacer que el receptor esté listo
• Conecte el dispositivo deseado al receptor y asegúrese de que esté encendido
4
. Ahora el receptor
está listo para usarse.
Uso de receptores
a. Pulse el botón “I” / “ON” en el transmisor para encender el receptor.
b. Pulse el botón “0” / “OFF” en el transmisor para apagar el receptor.
Desconectar todas las conexiones
a. Presione y mantenga el botón del receptor durante 10 segundos
5
.
b. Durante esta operación el LED comenzará a parpadear.
c. Cuando el LED del receptor se apague se desconectarán todas las conexiones.
Desconectar de la toma de corriente: extraiga el receptor del enchufe de la pared.
Specifications:
AC Input Voltage: 230V~50Hz.
Maximum distance: 30 m.
Maximum power: 3600 W.
Operating temperature: -10~50 °C.
Warranty: 2 years
10.037.08 | SH5-RPS-36A
433.92MHz.
ENWireless plug-in power switch
NLDraadloze plug-in netschakelaar
DE Funk-Einstecknetzstecker
FRCommutateur d’alimentation à brancher sans fil
ESInterruptor de alimentación inalámbrico enchufable
IT Presa di alimentazione
IT
Preparazione per l’uso
• Inserire il ricevitore (SH5-RPS-36A) nella presa a parete
1
.
Associazione del ricevitore al trasmettitore o relativa disconnessione
a. Tenere premuto il pulsante sul ricevitore per 3 secondi e rilasciarlo
2
. Durante questa operazione
il LED inizia a lampeggiare
3
. Il ricevitore a questo punto è in modalità di associazione.
Attenzione: il LED deve lampeggiare solo dopo il rilascio del pulsante. Se il LED inizia a lampeggiare
tenendo premuto il pulsante, l’associazione non sarà eettuata.
b. Premere il pulsante “I” / “ON” sul trasmettitore per associarlo al ricevitore. Durante questa operazione
il LED sul ricevitore si accende. Premere il pulsante “0” / “OFF” sul trasmettitore per scollegarlo dal
ricevitore. Durante questa operazione il LED sul ricevitore si spegne.
Attenzione: è possibile associare un ricevitore a vari trasmettitori, sono disponibili sei posizioni di
memoria.
Attenzione: Quando il LED sul ricevitore continua a lampeggiare rapidamente, la memoria è piena.
Scollegare un trasmettitore o tutti i collegamenti.
Preparazione del ricevitore
• Collegare un dispositivo desiderato al ricevitore e vericare che il dispositivo desiderato sia acceso
4
. A questo punto, il dispositivo è pronto all‘uso.
Utilizzo dei ricevitori
a. Premere il pulsante “I” / “ON” sul trasmettitore per attivare il ricevitore.
b. Premere il pulsante “0” / “OFF” sul trasmettitore per disattivare il ricevitore.
Scollegamento di tutti i collegamenti
a. Tenere premuto il pulsante sul ricevitore per 10 secondi
5
.
b. Durante questa operazione il LED inizia a lampeggiare.
c. Quando il LED sul ricevitore si disattiva, tutti i collegamenti saranno scollegati.
Scollegamento dalla rete elettrica: rimuovere il ricevitore dalla presa elettrica.
/2
%
Controllo rapido
Non sono un robot
Risposta errata, riprova.
Chatta con il manuale del tuo Smartwares SH5-RPS-36A utilizzando l'IA
Ottieni risposte istantanee dall'IA dal manuale del tuo Smartwares SH5-RPS-36A
Chiedi qualsiasi cosa sul Smartwares SH5-RPS-36A. Le risposte provengono da questo manuale, con le pagine di riferimento.
Fai una Domanda
0/1000
Consigli SH5-RPS-36A?
SìNo
0
Heinz Weber
5 mesi fa
Questo smart plug funziona in modo affidabile con altre stanze e dispositivi ad alto consumo come i riscaldatori?
0
Manual.ly
5 mesi fa
Sì, le nostre spine intelligenti sono progettate per gestire carichi di potenza più elevati, rendendole adatte per dispositivi come ventilatori riscaldanti. Mantengono anche un segnale forte anche quando utilizzate in stanze adiacenti o in condizioni meno ideali, garantendo un controllo affidabile tramite l'app mobile.
M: QW-35-FL
M: QW-35-FL
0
sabrina60
5 mesi fa
C'è confusione sul fatto che questi prodotti includano un telecomando?
M: QW-35-FL
Domande
frequenti
A
Insert the receiver into the wall outlet. Press and hold the button on the receiver for three seconds until the LED starts blinking. Then, press the ON button on your transmitter to complete the pairing process.
Questa risposta è utile?
A
Yes, the receiver supports up to six memory positions, allowing you to pair it with multiple transmitters simultaneously for convenient multi-user access.
Questa risposta è utile?
A
Rapid blinking indicates that all six memory slots are full. You must disconnect at least one existing transmitter or clear all links to add a new one.
Questa risposta è utile?
A
Press and hold the button on the receiver for ten seconds. The LED will blink and then turn off, indicating that all links have been successfully cleared.
Questa risposta è utile?
A
No, this device uses a dedicated radio frequency (433.92MHz) and does not connect to Wi-Fi or Bluetooth, so it cannot be controlled via smartphone apps.
Questa risposta è utile?
M: QW-35-FL
Vantaggie
Svantaggi
Vantaggi
Supports pairing with up to six different transmitters for versatile household control
High power capacity of 3600 Watts suitable for various appliances
Simple setup process requiring no apps or Wi-Fi configuration
Reliable 433.92MHz signal with a maximum range of 30 meters
Includes a two-year warranty for long-term reliability
VS
Svantaggi
Requires physical access to the receiver to clear all connections
No integration with voice assistants or mobile applications
Limited to 30-meter range which may be insufficient for large properties
LED indicator behavior can be confusing if held too long during pairing
Does not support energy monitoring or usage tracking features
M: QW-35-FL
Prodotto
Specifiche
Tipo
Attuatore
Standard
Bus radio (433 MHz)
Funzione
presa comandata (on/off)
Topologia
Stella
Dimensioni
9,7x7,5x5 cm
Nota
Controllabile con ogni telecomando HomeEasy, SmartHome e HomeWizard.
M: QW-35-FL
Descrizione del prodotto
Descrizione
Smart Home Convenience with the Smartwares SH5-RPS-36A
The Smartwares SH5-RPS-36A Smart Plug represents a seamless blend of simplicity and modern automation, designed to transform any standard appliance into an intelligent device. This wireless plug-in power switch operates on a robust 433.92MHz frequency, ensuring reliable communication between your remote control transmitter and the receiver unit plugged into your wall outlet. With a maximum power capacity of 3600 Watts, it handles everything from lamps and fans to small kitchen appliances without breaking a sweat.
Setting up this device is intuitive and requires no complex app installation or Wi-Fi configuration. Simply insert the receiver into a standard socket and pair it with one of your transmitters by holding the button for three seconds until the LED blinks. The system supports pairing with up to six different transmitters, making it perfect for households where multiple family members need independent control over lighting or heating. Once paired, connecting your desired appliance is as easy as plugging it in and ensuring it is switched on. The receiver then becomes ready to accept commands instantly.
Operating the Smartwares SH5-RPS-36A offers flexibility and ease. A simple press of the ON button on your remote activates the connected device, while the OFF button cuts the power immediately. For those moments when you need to reset the system or remove old connections, a ten-second hold on the receiver button clears all stored links, returning the unit to a fresh state. The unit functions reliably within temperatures ranging from -10 to 50 degrees Celsius and boasts a transmission range of up to 30 meters, allowing you to control devices from another room or even outside your home.
This smart plug is an excellent entry point into home automation, offering a reliable alternative to more complex systems. Its compact design ensures it does not obstruct adjacent outlets, and the included two-year warranty provides peace of mind. Whether you want to automate your morning coffee routine or simply turn off lights remotely, the Smartwares SH5-RPS-36A delivers consistent performance with minimal effort.
Key Notes
Maximum operating temperature is 50C.
Ensure the LED blinks only after releasing the button during pairing.
Rapid blinking indicates memory is full; disconnect unused remotes.
Heinz Weber
5 mesi fa
Questo smart plug funziona in modo affidabile con altre stanze e dispositivi ad alto consumo come i riscaldatori?
Manual.ly
5 mesi fa
Sì, le nostre spine intelligenti sono progettate per gestire carichi di potenza più elevati, rendendole adatte per dispositivi come ventilatori riscaldanti. Mantengono anche un segnale forte anche quando utilizzate in stanze adiacenti o in condizioni meno ideali, garantendo un controllo affidabile tramite l'app mobile.