EN
USER AND
WI-
Read before use
This document contains important technical and safety information about the
device, its safety use and installation.
⚠CAUTION! Before beginning the installation, please read this guide and any other
documents accompanying the device carefully and completely
installation procedures could lead to malfunction, danger to y
violation of the law or refusal of legal and/or commercial guarantee (if any). Allter
Robotics EOOD is not responsible for any loss or damage in case of incorrect instal-
lation or improper operation of this device due t
safety instructions in this guide.
Product Introduction
Shelly® is a line of innovative microprocessor-managed de-
mote control of electric circuits through a mobile phone, tablet, PC, or home auto-
mation system. Shelly® devices can work standalone in a local Wi-Fi network or
they can also be operated through cloud home aut
is a service that can be accessed using either Android or iOS mobile application,
or with any internet browser at https:/. Shelly® devices can
be accessed, controlled and monitored remotely fr
has internet connectivity
and the Internet. Shelly® devices have embedded Web Interface accessible at
http:/ when connected directly to the device access point, or at the
device IP address on the local Wi-Fi network. The embedded W
used to monitor and control the device, as well as adjust its settings.
Shelly® devices can communicate directly with other Wi-Fi devices through H
protocol. An API is provided by Allter
please visit: https:/.
Shelly® devices
are necessary to keep the devices in conformity-
co Robotics EOOD will provide the updates free of charge thr-
bedded Web Interface or Shelly Mobile Application, where the information about
the is available. or not the
rmware updates is user’
liable for any lack of conformity of the device caused by failure of the user to install
the provided updates in a timely manner
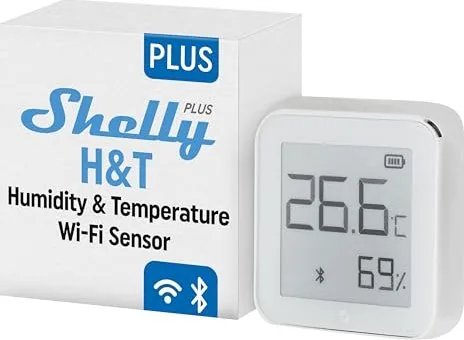
Shelly Plus H&T (the Device) is a Wi-Fi smart humidity and temperature sensor
Installation instruction
⚠CAUTION! Do not use the Device if it has been damaged.
⚠CAUTION! Do not attempt to service or repair the Device yourself.
1. Power supply
Shelly Plus H&T can be powered by 4 AA (LR6) 1.5 V batteries or a USB
power supply adapter
⚠CAUTION! Use the Device only with batteries or USB -
ers that comply with all applicable regulations. Inappropriate batteries or power
supply adapters may damage the Device and cause re.
A. Batteries
Remove
the
on g. 4.
⚠CAUTION! Make sure the batteries + and - signs correspond to marking on the
Device battery compartment (g. 2 A)
B. USB T
Insert the USB Type-C power supply adapter cable into the De
(g. 2 C)
⚠CAUTION! Do not connect the adapter to the Device if the adapter or the cable
are damaged.
⚠CAUTION! Unplug the USB cable before removing or placing the back co
⚠IMPORT The Device cannot be used to charge rechar
2. Starting
When initially powered the Device will be put in Setup mode and the display will
show SEt instead of the temperature. By default the Device access point is enabled,
which is indicated by AP in the bottom right corner of the display
press and hold the Reset button
⚠IMPORT T
and then goes to Sleep mode and the display will show the measured temper
Press Pressing
Reset button while the Device is in Setup mode will put the Device to Sleep mode.
3. Inclusion to Shelly Cloud
If you choose to use the Device with the Shelly Cloud mobile application and Shelly
Cloud service, instructions on how to connect the Device to the Cloud and control it
through the Shelly App can be found in the “
The Shelly Mobile Application and Shelly Cloud service are not conditions for the
Device to function properly
other home automation platforms and protocols.
⚠CAUTION! Do not allow children to play with the buttons/switches connected t
the Device. Keep the Devices for remote contr
PCs) away from children.
4. Manually connecting to a local Wi-Fi network
Shelly Plus H&T can be managed and controlled through its embedded web inter-
face. Make sure the Device is in Setup mode, its access point is enabled and you are
connected to it using a Wi-Fi enabled device. From a web br
Web
expand the Wi section.
Enable the Wi1 and/or Wi2 (backup network) by toggling the corresponding
Enable switch. Enter the Wi-Fi network name(s) (SSID) or select it(them) by clicking
on the gray Click here t
and click APPL
The
device is successfully connected to the Wi-Fi network.
⚠RECOMMENDA For security reasons we r
mode, after the Device successful connection to the local Wi-Fi network. Expand the
Access point section and toggle the Enable switch.
When ready including the Device to Shelly Cloud or another service, place the back
cover
DE
BEDIENUNGS-
WI-
TEMPERA
Bitte vor Gebrauch durchlesen
Dieses Dokument enthält wichtige technische und sicherheitstechnische Infor-
mationen über das Gerät und seine sichere V
⚠ACHTUNG! Bevor Sie mit der Installation beginnen, lesen Sie bitte die Begleitdo-
kumentation sorgfältig und vollständig durch. Die Nichtbeachtung der empfohlenen
Verfahren kann zu Fehlfunktionen, Lebensgefahr oder Gesetz
Allterco Robotics EOOD haftet nicht für Verluste oder Schäden im F-
schen Installation oder Bedienung dieses Geräts.
Produktvorstellung
Shelly® ist eine Produktserie innovativer-
che die Fernsteuerung von Elektroger
PC oder ein Hausautomatisierungssystem ermöglichen. Shelly® Geräte können
eigenständig in
Cloud-Dienste für die Hausautomatisierung betrieben werden. Shelly Cloud ist ein
solcher Dienst, auf den entweder über eine Android- oder iOS-Applikation oder über
einen beliebigen Internetbrowser unter https:/ zugegriffen
werden kann. Shelly® Geräte können von jedem Ort aus, an dem der Benutzer eine
Internetverbindung hat, angesprochen, gesteuert und überwacht werden, solange
die Geräte mit einem WLAN-Router -
räte verfügen über eine integrierte Web-Schnittstelle, die unter http:/
im WLAN-Netzwerk zugänglich ist, das vom Gerät im Access Point-Modus erstellt
wird, -
bunden ist. Díe integrierte Web-Schnittstelle kann zur Überwachung und Steuerung
des Gerätes sowie zur Anpassung dessen Einstellungen verwendet werden.
Shelly® Ger
kommunizieren. Eine API wird von Allterco Robotics EOOD ber-
tere Informationen besuchen Sie bitte:
https:/.
Shelly® Geräte werden mit werkseitig installierter Firmware ausgeliefert. Um die
Geräte konform zu halten, stellt Allterco Robotics EOOD die notwendigen Firm-
ware-Updates, einschließlich der Sicherheitsupdates, kostenlos über die im Gerät
eingebettete Web-Schnittstelle sowie über die Shelly-App zur Verfügung. Die Ent-
scheidung, die Firmware-Updates des Geräts zu installier
alleinigen Verantwortung des Benutzers. Allterco Robotics EOOD haftet
Konformitätsmängel des Geräts, die dar-
zer die bereitgestellten Updates nicht rechtzeitig installiert hat.
Shelly Plus H&T (das Gerät) ist ein intelligenter Wi-Fi-L-
peratursensor
Installationsanleitung
⚠VORSICHT! Verwenden Sie das Ger
⚠VORSICHT! Versuchen Sie nicht, das Ger
1. Stromzufuhr
Shelly Plus H&T kann mit 4 Batterien des
C-Netzteil betrieben werden.
⚠VORSICHT! Verwenden Sie das Ger-
adaptern, die allen geltenden Vorschriften entsprechen. Ungeeignete Batterien oder
Netzteile können das Gerät beschädigen und einen Brand v
A. Batterien
Entfernen die Abdeckung der einem achen Schrauben-
zieher (siehe
die Batterien der oberen Reihe (siehe Abb. 4) ein.
⚠VORSICHT! Achten Sie darauf, dass die + und - Zeichen der Batterien mit den
Markierungen auf dem Batteriefach des Geräts übereinstimmen (Abb. 2 A).
B. USB-Typ-C-Netzteiladapter
Stecken Sie das Kabel des USB-T in den USB-Typ-C-An-
schluss des Geräts (Abb. 2 C).
⚠VORSICHT! Schließen Sie den Adapter nicht an das Gerät an, wenn der Adapter
oder das Kabel beschädigt sind.
⚠VORSICHT! Ziehen Sie das USB-Kabel ab, bevor Sie die hintere Abdeckung ent-
fernen oder anbringen.
⚠WICHTIG: Das
verwendet werden.
2. Einschalten
Beim -
play wird SEt anstelle der T-
punkt des Geräts aktiviert, was durch AP in der unteren rechten Eck
angezeigt wird.
Sekunden lang gedrückt, um ihn zu aktivieren.
⚠WICHTIG: Um die Batterien zu schonen, bleibt das Gerät 3 Minuten lang im Ein-
stellungsmodus und geht dann in den Ruhemodus über-
messene T-
der in den Setup-Modus zu bringen. Durch kurzes Drücken der Reset-T
sich das
3. Einbindung in Shelly Cloud
Wenn Sie sich dafür entscheiden, das Gerät mit der Shelly Cloud
Shelly
Geräts mit der Cloud und zur Steuerung über die Shelly App im “
Shelly Mobile App und der Shelly Cloud Service sind keine Vor
ordnungsgemäße Funktionieren des Ger
verschiedenen anderen Hausautomatisierungsdiensten und -anwendungen ver-
wendet werden.
⚠VORSICHT! Erlauben Sie Kindern nicht, mit den an das Gerät angeschlossenen
T
(z.B.: Mobiltelefone, T
4. Manuelle Verbindung mit einem lokalen Wi-Fi-Netzwerk
Shelly Plus H&T kann über seine integrierte Webschnittstelle verwaltet und gesteu-
ert
sein Zugangspunkt aktiviert ist und Sie über ein Wi-Fi-fähiges Gerät mit dem Gerät
verbunden sind. Öffnen Sie in einem Webbrowser die W
indem
(Netzwerke) und erweitern Sie dann den Abschnitt Wi.
Aktivieren Sie Wi1 Wi2 (Backup-Netzwerk), indem Sie den entspr-
chenden Aktivierungsschalter umlegen. -
werks (SSID)
here klicken. Geben Sie Passwor das Wi-Fi-
Netzwerk ein und klicken Sie auf ANWENDEN.
Die Geräte-URL erscheint in blauer F
das Gerät erfolgreich mit dem Wi-Fi-Netzwerk verbunden ist.
⚠EMPFEHLUNG: Aus Sicherheitsgründen empfehlen wir-
IT
GUIDA ALL
SENSORE DI
Leggere prima dell’uso
Questo documento contiene importanti informazioni tecniche e di sicurezza sul
dispositivo e sul suo uso e installazione in sicurezza.
⚠A Prima di iniziare l’installazione leggere attentamente e comple-
tamente la documentazione allegata. La mancata osservanza delle procedure con-
sigliate potrebbe portare a malfunzionamenti, pericolo per la vita o violazione della
legge. Allterco Robotics EOOD non è responsabile per eventuali perdite o danni in
caso di installazione o funzionamento errati di questo dispositiv
Introduzione al prodott
Shelly® è una linea di dispositivi innovativi gestiti da micropr-
tono il controllo remoto degli elettr
tablet, un PC o un sistema domotico. I dispositivi Shelly® sono in grado di fun-
zionare autonomamente in una rete Wi-Fi locale o possono anche esser
attraverso servizi di automazione domestica cloud. Shelly Cloud è un servizio di
questo a cui si accedere un’ Android o
iOS o con qualsiasi browser internet su https:/. I dispositivi
Shelly® sono accessibili, controllati e monitorati a distanza
cui l’utente abbia una connettività Internet, pur
router Wi-Fi e
accessibile a http:/
Access Point,
L
dispositivo, così come per regolare le sue impostazioni.
I dispositivi Shelly® sono in grado di comunicare direttamente con altri
Wi-Fi attra
maggiori informazioni, visitare:
https:/.
I dispositivi Shelly®
sono -
mità,
aggiornamenti gratuitamente attraverso web incorporata dispo-
sitivo o l’applicazione mobile Shelly, sono disponibili le informazioni sulla
versione
del -
botics EOOD -
sitivo
in modo tempestivo.
Shelly Plus H&T (il Dispositivo) è un sensore di umidità e
Wi-Fi.
Istruzioni per l’installazione
⚠ANon utilizzare il Dispositivo se è stato danneggiato.
⚠ANon tentare di riparare il Dispositiv
1. Alimentazione
Shelly Plus H&T può essere alimentato da 4
adattatore di alimentazione USB T
⚠AUtilizza il dispositivo solo con batterie o adattatori di alimentazio-
ne USB T-
tazione inadeguati possono danneggiare il Dispositivo e causare incendi.
A. Batterie
Rimuovi il coperchio posteriore del dispositivo con un caccia-
strato
le batterie della la superiore come mostrato in gur
⚠AAssicurati che i segni + e - delle batterie corrispondano alla mar-
catura sul vano batterie del dispositivo (g. 2 A).
B. Adattatore di alimentazione USB
Inserisci il cavo dell’adattatore di alimentazione USB Type-C nella porta USB
Type-C del dispositiv
⚠A Non collegare l’adattat
sono danneggiati.
⚠A Scollega il cavo USB prima di rimuovere o riporr
posteriore.
⚠IMPORT il Dispositivo non può essere utilizzato per caricare batterie ri-
caricabili.
2. Avvio
Quando viene alimentato inizialmente, il dispositivo entra in modalità Setup e il di-
splay mostr
di accesso
destra del
5 secondi per abilitarlo.
⚠IMPORT per risparmiare le batterie, il dispositivo rimane in modalità Setup
per 3 minuti e poi passa in modalità Sleep e il display mostra la temper-
rata. Premi brev
brevemente il pulsante Reset mentre il dispositivo è in modalità Setup, il dispositiv
passa in modalità Sleep.
3. Inclusione a Shelly Cloud
Se
servizio Shelly Cloud, le istruzioni su come collegare il dispositivo al Cloud e con-
trollarlo attraverso l’
Shelly e il servizio Shelly Cloud non sono condizioni per il corretto funzionamento
del Dispositivo. Questo Dispositivo può essere utilizzat-
plicazioni di automazione domestica.
⚠A Non permettere ai bambini di giocare con i pulsanti/interruttori
collegati al Dispositivo. T
cellulari, tablet, PC) lontano dai bambini.
4. Collegamento manuale a una rete Wi-Fi locale
Shelly Plus H&T può essere gestit
integrata. punto
accesso sia abilitato e che tu sia connesso con un dispositivo Wi-Fi. Da un browser
web apri
pulsante Reti e poi espandi la sezione Wi.
Abilita la r Wi1 e/o Wi2 (r di backup) l’interrutt corri-
spondente. Inserisci il nome della rete Wi-Fi (SSID) o selezionala cliccando sul
link grigio Clicca qui per selezionare la rete. Inserisci la password della rete Wi-Fi
e clicca su APPLICA.
L-
do il dispositivo si sarà connesso correttamente alla r
⚠RACOMMANDAZIONE: per motivi di sicurezza si consiglia di disabilitare la mo-
dalità AP dopo che il dispositivo si è connesso con successo alla rete Wi-Fi locale.
Espandi la sezione Punto di accesso e attiva l’interruttore Abilita.
Quando sei pronto per includere il dispositivo in Shelly
⚠CAUTION! Unplug the USB cable before removing or placing the back co
5. Attaching the stand
If you want to place the Device on your desk, on a shelf or any other horiz
surface, attach the stand as shown on g. 5.
6. Wall mounting
If you want to mount the Device on a wall or any other vertical surface use the back
cover to mark the wall where you want t
⚠CAUTION! Do not drill through the back cover
Use screws -
ter to x the Device t
Another option to mount the Device is using a double sided foam sticker
⚠CAUTION! The Device is intended for indoor use only
⚠CAUTION! Protect the Device from dirt and moisture.
⚠CAUTION! Do not use the Device in a damp environment and avoid water splash-
ing.
Reset button actions
The Reset button is shown on g.2 B.
Press briey:
• If the Device is in Sleep mode, puts it in Setup mode.
• If the Device is in Setup mode, puts it in Sleep mode.
Press and hold for 5 sec: If the Device is in Setup mode, enables its access point.
Press and hold for 10 sec: If the Device is in Setup mode, factory resets the Device.
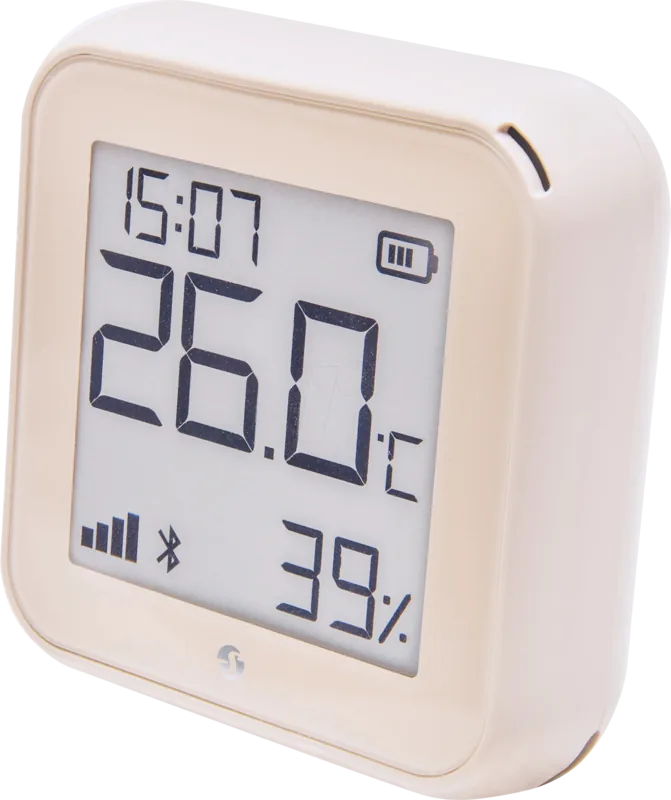
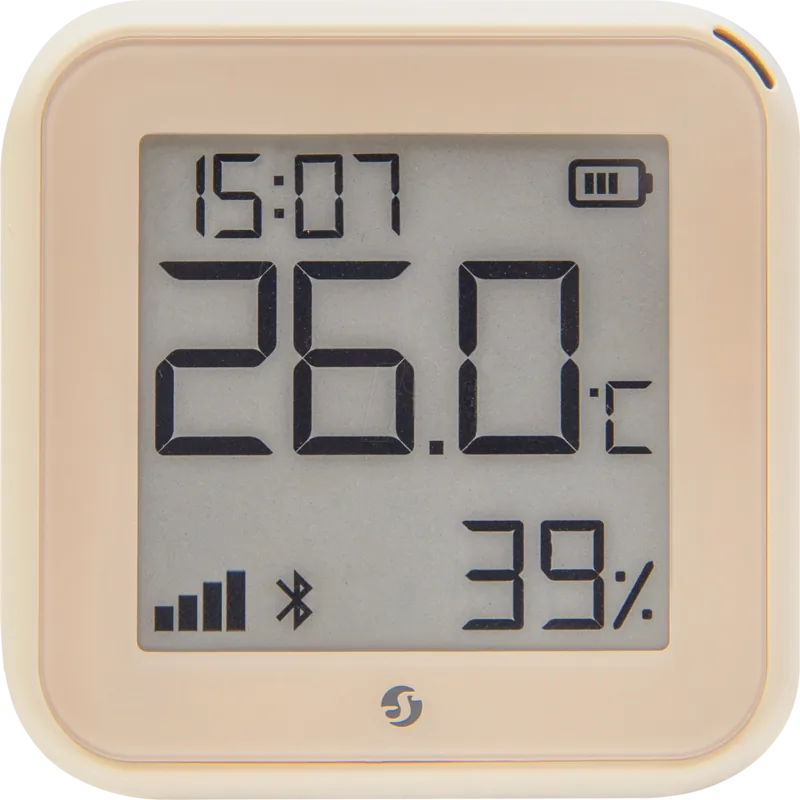
Display
•
• The Device access point is enabled.
• Humidity
•
instead of the humidity
• Device has reported current readings to the Cloud. If missing, the current
readings on the display are not yet r
the display may differ from the ones in the Cloud.
• Wi-Fi signal strength indicator
• Indicates batter
•
Bluetooth connectivity is enabled. Bluet
disabled from the Shelly app or the Device local web interface.
• ▲ Error while updating the Device rmware
Specication
• Power supply:
- Batteries: 4 AA (LR6) 1.5 V (batteries not included)
- USB power supply: T
• Estimated battery life: Up to 12 months (alkaline batteries)
• Humidity sensor measurement range: 0-100%
• Working temperature: 0°C-40°C
• Radio signal power: 1mW
• Radio protocol: Wi-Fi 802.11 b/g/n
• Frequency: 2412-2472 МHz; (Max. 2483,5 MHz)
• Max RF output power Wi-Fi: 15 dBm
• Dimensions without stand (HxWxD): 70x70x26 mm
• Dimensions with stand (HxWxD): 70x70x45 mm
• Operational range: up t
• Bluetooth: v
• Bluetooth modulation: GFSK, π/4-DQPSK, 8-DPSK
• Bluetooth frequency: TX/RX - 2402 - 2480MHz
• Max. RF output power Bluetooth: 5 dBm
• Webhooks (URL actions): 10 with 2 URLs per hook
• MQTT: Y
• CPU: ESP32
• Flash: 4 MB
Declaration of conformity
Hereby
Plus
2011/65/EU.
following internet address:
https:/
Manufacturer: Allterco Robotics EOOD
Address: Bulgaria, Soa, 1407, 103 Cherni vrah Blvd.
Tel.: +359 2 988 7435
E-mail: support@shelly
Web: https:/
Changes in the contact data -
site of the Device https:/
All rights to trademark Shelly®, and other intellectual rights associated with this
Device belong to Allterco Robotics EOOD
tivieren, nachdem das Gerät erfolgreich mit dem lokalen Wi-Fi-Netzwerk verbunden
wurde. Erweitern Sie den Abschnitt Zugangspunkt und schalten Sie den Schalter
Aktivieren um.
Wenn Sie bereit sind, das Ger-
zubinden, schließen Sie die hintere Abdeckung.
⚠VORSICHT! Ziehen Sie das USB-Kabel ab, bevor Sie die hintere Abdeckung ent-
fernen oder anbringen.
5. Befestigen des Ständers
Wenn Sie das Gerät auf Ihr
horizontalen Fläche aufstellen möchten, bringen Sie den Ständer wie in Abb. 5 ge-
zeigt an.
6. Wandmontage
Wenn Sie das Gerät an einer W
möchten, markieren Sie die Wand, an der Sie das Ger
der hinteren Abdeckung.
⚠VORSICHT! Bohren Sie nicht durch die hinter
Verwenden Sie Schrauben mit einem K
einem
oder einer anderen vertikalen Fläche zu befestigen.
Eine weitere Möglichkeit zur Befestigung des Ger-
pelseitigen Schaumstoffaufklebers.
⚠VORSICHT! Das Gerät ist nur für die V
⚠VORSICHT! Schützen Sie das Ger
⚠VORSICHT! V-
meiden Sie Wasserspritzer
Aktionen der Reset-T
Die Reset-T
Drücken Sie sie kurz:
• Wenn sich -
setzt.
• Wenn sich -
setzt.
5 Sekunden lang drücken: Wenn das Setup-Modus bendet,
sein Zugangspunkt aktiviert.
10 Sekunden lang gedrückt halten:
wird das Gerät auf Werkseinstellungen zurück
Anzeige
•
• Der Zugangspunkt des Geräts ist aktiviert.
• Luftfeuchtigkeit
• Das Gerät erhält ein Over-the-Air-Update. Zeigt den
anstelle der Luftfeuchtigk
• Das Gerät hat aktuelle Messwerte an die Cloud gemeldet. Fehlt diese Anga -
be, werden die aktuellen Messwerte auf dem Display noch nicht gemeldet.
In diesem Fall können die Messwerte auf dem Display von denjenigen in
der Cloud abweichen.
• Anzeige der Wi-Fi-Signalstärke
• Zeigt den Batteriestand an. Zeigt eine leere Batterie an, wenn das Gerät
über USB mit Strom versorgt wird.
•
Die Bluetooth-Verbindung ist aktiviert. Bluetooth wird für die Aufnahme ver-
wendet. Sie kann über die Shelly App oder die lokale Webschnittstelle des
Geräts deaktiviert werden.
• ▲ Fehler beim Aktualisieren der Gerätermwar
T
• Stromversorgung:
- Batterien: 4 AA (LR6) 1,5 V (Batterien nicht enthalten)
- USB-Stromversorgung: T
• Geschätzte Lebensdauer der Batterie: Bis zu 12 Monate (Alkali-Batterien)
• Messbereich des Luftfeuchtigk
• Arbeitstemperatur: 0°C-40°C
• Leistung des Funksignals: 1mW
• Funkprotokoll: Wi-Fi 802.11 b/g/n
• Frequenz: 2412-2472 МHz; (Max. 2483,5 MHz)
• Maximale RF-Ausgangsleistung Wi-Fi: 15 dBm
• Abmessungen ohne Ständer (HxBxT): 70x70x26 mm
• Abmessungen mit Standfuß (HxBxT): 70x70x45 mm
• Betriebsreichweite: bis zu 50 m im Freien / bis zu 30 m in Gebäuden
• Bluetooth: v
• Bluetooth-Modulation: GFSK, π/4-DQPSK, 8-DPSK
• Bluetooth-Frequenz
• Maximale RF-Ausgang Bluetooth: 5 dBm
• Webhooks (URL-Aktionen): 10 mit 2 URLs pro Hook
• MQTT: Ja
• CoAP: Ja
• REST
• CPU: ESP32
• Flash: 4MB
Konformitätserklärung
Hiermit erklärt Allterco Robotics EOOD, dass der F
der Richtlinie 2014/53/EU,
vollständigen Text der -
netadresse
https:/
Hersteller: Allterco Robotics EOOD
Adresse: 103 Cherni vrah Blvd., 1407 Soa, Bulgarien
Tel.: +359 2 988 7435
E-Mail: support@shelly
Internet: https:/
Änderungen -
site veröffentlicht
Alle Rechte an der Marke Shelly® und anderen geistigen Eigentumsrechten im Z-
sammenhang mit diesem Gerät gehören Allterco Robotics EOOD
posiziona il coperchio posteriore.
⚠AScollega il ca
posteriore.
5. Fissare il supporto
Se vuoi posizionare il Dispositivo sulla scrivania, su una mensola o su qualsiasi
altra supercie orizzontale, ssa il supporto come mostrat
6. Montaggio a parete
Se vuoi
il coperchio posteriore per segnare la parete su cui vuoi montar
⚠A Non forare il coperchio posterior
Per ssare il dispositivo
diametro della
di 3 mm.
Un’
⚠A Il Dispositivo è destinato esclusivamente all’uso in ambienti in-
terni.
⚠AProteggi il Dispositivo da sporco e umidità.
⚠ANon utilizzare il dispositivo in un ambiente umido ed evita gli
schizzi d’acqua.
Azioni del pulsante di reset
Il pulsante di reset è mostrato nella g. 2 B.
Premilo brevemente:
• Se il dispositivo è in modalità Sleep, passa alla modalità Setup.
• Se il dispositivo è in modalità Setup, passa in modalità Sleep.
Tieni premuto per 5 secondi: è in Setup, il suo
punto di accesso.
Tieni premuto per 10 secondi: se
il reset di fabbrica del dispositivo.
Display
•
•
Il punto di accesso del dispositivo è abilitato.
• Umidità
•
-
to in percentuale invece dell’umidità.
• Il dispositivo ha segnalato le letture correnti al Cloud. Se manca, i v
attuali sul display non sono ancora stati segnalati. In questo caso, le lettur
sul display possono differire da quelle nel Cloud.
• Indicatore della potenza del segnale Wi-Fi
• Indica il livello della batteria. Mostra una batteria scarica quando è alimen-
tato via USB.
•
La -
sione. Può
locale del dispositivo.
• ▲ Errore dur
Speciche tecniche
• Alimentazione:
- Batterie: 4 AA (LR6) 1,5 V (batterie non incluse)
- Alimentazione USB: Tipo-C (cavo non incluso)
• Durata stimata della batteria: Fino a 12 mesi (batterie alcaline)
• Intervallo di misurazione del sensore di umidità: 0-100%
• T
• Potenza del segnale radio: 1mW
• Protocollo radio: Wi-Fi 802.11 b/g/n
• Frequenza: 2412-2472 МHz; (Max. 2483,5 MHz)
• Potenza massima di uscita RF: 15 dBm
• Dimensioni senza supporto (HxLxP): 70x70x26 mm
• Dimensioni con supporto (HxLxP): 70x70x45 mm
• Raggio d’azione: no a 50 m all’
• Bluetooth: v
• Modulazione Bluetooth: GFSK, π/4-DQPSK, 8-DPSK
• Frequenza Bluetooth
• Uscita massima RF Bluetooth: 5 dBm
• Webhook (azioni URL): 10 con 2 URL per ogni hook
• MQTT: Sì
• CoAP: Sì
• API REST: Sì
• CPU: ESP32
• Flash: 4MB
Dichiarazione di conformità
Con la presente, Allterco Robotics EOOD dichiara che il tipo di appar-
dio Shelly
UE, 2011/65/UE. -
bile al seguente indirizzo internet
https:/
Produttore: Allter
Indirizzo: Bulgaria, Soa, 1407, 103 Cherni vrah Blvd.
Tel.: +359 2 988 7435
E-mail: support@shelly
Web: https:/
Le -
ciale del Dispositivo
T-
sitivo appartengono a Allterco Robotics EOOD
g.1 g.2
g.5 g.4
24/2022