Manual.ly Logo

NZXT Aer RGB 2 Manuale

0,0 · 0 Valutazioni

Manuale PDF · 2 Pagine

Italiano

M: GO-GEM-FL-25
pagina

/ 2

Loading...
336bff00a91e062a3fce10b7834c343d744b page 1
STEP 5
Connect the 4-pin power cable to an open fan header on your motherboard or fan controller.
Conecta el cable de alimentación de 4 patillas a un cabezal para ventilador abierto en tu placa
base o controlador de ventilador.
Connectez le câble d'alimentation à 4 broches à un connecteur pour ventilateur disponible sur
la carte mère ou le contrôleur de ventilateur.
Schließen Sie das 4-polige Stromkabel an einen freien Lüfteranschluss des Mainboards oder
der Lüftersteuerung an.
Collegare il cavo di alimentazione a 4 pin a una porta libera della ventola sulla scheda madre o
nel controller della ventola.
Conecte o cabo de alimentação de 4 pinos a um leitor de ventoinha aberto em sua placa-mãe
ou controlador de ventoinha.
Подключите
4-
контактный
кабель
питания
к
открытому
разъему
вентилятора
на
материнской
плате
или
контроллере
вентилятора
.
4핀 전원 케이블을 마더보드 또는 팬 컨트롤러의 개방된 팬 헤더에 연결합니다.
4 ピン電源ケーブルをマザーボードのオープンファンヘッダーまたはファンコントローラに接続します。
将 4 针电源线连接到主板或风扇控制器上的开放式风扇接口。
將 4 針腳電源線連接至主機板上可用的風扇接頭,或是風扇控制器。
COMPONENT LIST
INSTALLATION
LISTA DE COMPONENTES
LISTE DES COMPOSANTS
KOMPONENTENLISTE
ELENCO DEI COMPONENTI
LISTA DE COMPONENTES
СПИСОК
КОМПЛЕКТУЮЩИХ
구성품 목록
部品リスト
零件表
零件表
Instalación
Installation
installieren
Installazione
Instalação
Установка
설치
取り付け
安装
安裝
AER RGB 2
120MM / 140MM RGB FANS FOR HUE 2
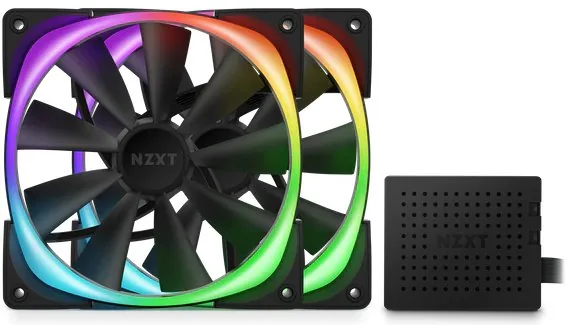
A Aer RGB Fan
120 / 140 Single - x1
120 / 140 Twin starter - x2
120 Triple Starter - x3
F 500mm Fan-to-Fan Cable
120 / 140 Single - x1
120 / 140 Twin Starter - x1
120 Triple Starter - x2
D 300mm Molex Power Cable
120 / 140 Single - x0
120 / 140 Twin Starter - x1
120 Triple Starter - x1
B
HUE 2 Lighting Controller
120 / 140 Single - x0
120 / 140 Twin Starter - x1
120 Triple Starter - x1
G
500mm Fan-to-Accessory Cable
120 / 140 Single - x1
120 / 140 Twin Starter - x1
120 Triple Starter - x2
E 600mm Micro-USB Cable
120 / 140 Single - x0
120 / 140 Twin Starter - x1
120 Triple Starter - x1
C 500mm Fan Connection Cable
120 / 140 Single - x1
120 / 140 Twin Starter - x1
120 Triple Starter - x2
H M5 Screw
120 / 140 Single - x4
120 / 140 Twin Starter - x8
120 Triple Starter - x12
I 500mm Lighting Connection Cable
120 / 140 Single - x0
120 / 140 Twin Starter - x4
120 Triple Starter - x4
STEP 1
STEP 3
STEP 4
STEP 2
Connect the Molex power cable to HUE 2 Lighting Controller.
Conecta el cable de alimentación Molex al controlador de iluminación HUE 2.
Connectez le câble d'alimentation Molex au contrôleur d'éclairage HUE 2.
Verbinden Sie das Molex-Stromkabel mit der HUE 2-Beleuchtungssteuerung.
Collegare il cavo di alimentazione Molex al controller di illuminazione HUE 2.
Plugue o cabo de alimentação Molex no controlador de iluminação HUE 2.
Подсоедините
кабель
питания
Molex
к
контроллеру
подсветки
HUE 2.
HUE 2 조명 컨트롤러에 Molex 전원 케이블을 연결합니다.
Molex 電源ケーブルを HUE 2 ライティングコントローラに接続します。
将 Molex 电源线连接到 HUE 2 照明控制器。
將 Molex 電源線連接至 HUE 2 燈光控制器。
Connect the fan connection cable to HUE 2 and to the In port on the Aer RGB fan.
Conecta el cable de conexión del ventilador a HUE 2 y al puerto de entrada en el ventilador
Aer RGB.
Branchez le câble de connexion du ventilateur au HUE 2 et au port d'entrée du ventilateur
Aer RGB.
Schließen Sie das Lüfter-Anschlusskabel an das HUE 2 und den Eingang (In) des Aer RGB-
Lüfters an.
Collegare il cavo di connessione della ventola all'HUE 2 e alla porta IN nella ventola Aer RGB.
Conecte o cabo de conexão da ventoinha ao HUE 2 e à porta de entrada na ventoinha Aer RGB.
Подключите
соединительный
кабель
вентилятора
к
HUE 2
и
к
порту
In
на
вентиляторе
Aer RGB.
팬 연결 케이블을 HUE 2와 Aer RGB 팬의 입력 포트에 연결합니다.
ファン接続ケーブルを HUE 2 と Aer RGB ファンの In ポートに接続します。
将风扇连接线连接到 HUE 2 和 Aer RGB 风扇上的输入端口。
將風扇連接線連接至 HUE 2 及 Aer RGB 風扇上的輸入埠。
To add another fan, connect the 500mm Fan-to-Fan cable between the Out port on the first fan
and the In port on the next.
Para agregar otro ventilador, conecta el cable de ventilador a ventilador de 500 mm entre el
puerto de salida del primer ventilador y el puerto de entrada del siguiente ventilador.
Pour associer un autre ventilateur, connectez le câble ventilateur/ventilateur de 500 mm entre le
port de sortie du premier ventilateur et le port d'entrée du second ventilateur.
Um einen weiteren Lüfter hinzuzufügen, schließen Sie das Lüfter-zu-Lüfter-Kabel zwischen dem
Ausgang (Out) des ersten Lüfters und dem Eingang (In) des nächsten Lüfters an.
Per aggiungere un'altra ventola, collegare il cavo ventola-ventola da 500 mm tra la porta OUT
nella prima ventola e la porta IN nella ventola successiva.
Para adicionar outra ventoinha, conecte o cabo de ventoinha para ventoinha de 500 mm entre a
porta de saída na primeira ventoinha e a porta de entrada na seguinte.
Чтобы
добавить
еще
один
вентилятор
,
подключите
500-
миллиметровый
соединительный
кабель
для
вентиляторов
к
порту
Out
первого
вентилятора
и
порту
In
другого
вентилятора
.
Connect the HUE 2 USB cable to an open USB 2 header on the motherboard and HUE 2 Lighting
Controller.
Conecta el cable USB HUE 2 a un cabezal USB 2 abierto en la placa base y el controlador de
iluminación HUE 2.
Connectez le câble USB HUE 2 à un connecteur USB 2 disponible sur la carte mère et le
contrôleur d’éclairage HUE 2.
Verbinden Sie das HUE 2-USB-Kabel mit einem freien USB 2-Anschluss des Mainboards und der
HUE 2-Beleuchtungssteuerung.
Collegare il cavo USB HUE 2 a una presa USB 2 libera sulla scheda madre e al controller di
illuminazione HUE 2.
Conecte o cabo USB HUE 2 a um leitor USB 2 aberto na placa-mãe e no controlador de
iluminação HUE 2.
Подключите
USB-
кабель
HUE 2
к
открытому
разъему
USB 2
на
материнской
плате
и
контроллере
подсветки
HUE 2.
HUE 2 USB 케이블을 마더보드의 개방된 USB 2 헤더와 HUE 2 조명 컨트롤러에 연결합니다.
HUE 2 USB ケーブルをマザーボード上の USB 2 ヘッダーと HUE 2 ライティングコントローラに接続します。
将 HUE 2 USB 电缆连接到主板和 HUE 2 照明控制器上的开放式 USB 2 接口。
將 HUE 2 USB 線連接至主機板上可用的 USB 2 接頭及 HUE 2 燈光控制器。
팬을 추가하려면 기존 팬의 출력 포트와 다른 팬의 입력 포트를 500mm 팬 연결 케이블로 연결합니다.
ファンを追加するには、500mm ファン間ケーブルで 1 つめのファンの Out ポートと次のファンの In ポ
ートを接続します。
要添加另一个风扇,请在第一个风扇的输出端口与下一个风扇的输入端口之间连接 500 毫米风扇到风扇
电缆。
若要新增其他風扇,請使用 500mm 風扇對風扇纜線連接第一個風扇的輸出埠與下一個風扇的輸入埠。
A .
Ventilador Aer RGB
B .
Controlador de iluminación HUE 2
C .
Cable de conexión de ventilador de 500mm
D .
Cable de alimentación Molex de 300mm
E .
Cable micro-USB de 600mm
F .
Cable de ventilador a ventilador de 500mm
G .
Cable de ventilador a accesorio de 500mm
H .
Tornillo M5
I .
Cable de conexión de iluminación de 500mm
A .
Ventilateur Aer RGB
B .
Contrôleur d'éclairage HUE 2
C .
Câble de connexion du ventilateur de 500mm
D .
Câble d'alimentation Molex 300mm
E .
Câble Micro USB de 600mm
F .
Câble ventilateur/ventilateur de 500mm
G .
Câble ventilateur/accessoire de 500mm
H .
Vis M5
I .
Câble de connexion d'éclairage de 500mm
A .
Aer RGB-Lüfter
B .
HUE 2-Beleuchtungssteuerung
C .
Lüfter-Anschlusskabel, 500mm
D .
Molex-Stromkabel, 300mm
E .
Micro-USB-Kabel, 600mm
F .
Lüfter-zu-Lüfter-Anschlusskabel, 500mm
G .
Lüfter-Zubehör-Anschlusskabel, 500mm
H .
M5-Schraube
I .
Beleuchtungsverbindungskabel, 500mm
A .
Ventola Aer RGB
B .
Controller di illuminazione HUE 2
C .
Cavo di connessione ventola da 500mm
D .
Cavo di alimentazione Molex da 300mm
E .
Cavo micro-USB da 600mm
F .
Cavo ventola-ventola da 500mm
G .
Cavo ventola-accessorio da 500mm
H .
Vite M5
I .
Cavo di connessione illuminazione da 500mm
A .
Ventoinha Aer RGB
B .
Controlador de iluminação HUE 2
C .
Cabo de conexão de ventoinha de 500mm
D .
Cabo de alimentação Molex de 300mm
E .
Cabo micro USB de 600mm
F .
Cabo de ventoinha para ventoinha de 500mm
G .
Cabo de ventoinha para acessório de 500mm
H .
Parafuso M5
I .
Cabo de conexão de iluminação de 500mm
A .
Вентилятор
Aer RGB
B .
Контроллер
подсветки
HUE 2
C .
Соединительный
кабель
вентилятора
длиной
500
мм
D .
Кабель
питания
Molex
длиной
300
мм
E .
Кабель
Micro-USB
длиной
600
мм
F .
Соединительный
кабель
для
вентиляторов
длиной
500
мм
G .
Соединительный
кабель
от
вентилятора
к
аксессуару
длиной
500
мм
H .
Винты
M5
I .
Соединительный
кабель
подсветки
длиной
500
мм
A .
Aer RGB 팬
B .
HUE 2 조명 컨트롤러
C .
500mm 팬 연결 케이블
D .
300mm Molex 전원 케이블
E .
600mm 마이크로 USB 케이블
F .
500mm 팬 연결 케이블
G .
500mm 팬-액세서리 연결 케이블
H .
M5 나사
I .
500mm 조명 연결 케이블
A .
Aer RGB ファン
B .
HUE 2 ライティングコントローラ
C .
500mm ファン接続ケーブル
D .
300mm Molex 電源ケーブル
E .
600mm Micro-USB ケーブル
F .
500mm ファン間ケーブル
G .
500mm ファン・アクセサリ間ケーブル
H .
M5 ネジ
I .
500mm ライティング接続ケーブル
A .
Aer RGB 风扇
B .
HUE 2 照明控制器
C .
500 毫米风扇连接线
D .
300 毫米 Molex 电源线
E .
600 毫米 Micro-USB 电缆
F .
500 毫米风扇到风扇电缆
G .
500 毫米风扇到附件电缆
H .
M5 螺丝
I .
500 毫米照明连接线
A .
Aer RGB 風扇
B .
HUE 2 燈光控制器
C .
500mm 風扇連接線
D .
300mm Molex 電源線
E .
600mm Micro-USB 線
F .
500mm 風扇對風扇纜線
G .
500mm 風扇對配件纜線
H .
M5 螺絲
I .
500mm 燈光連接線
MODE CUSTOMIZATIONS
Personalizaciones del modo de iluminación
Personnalisations du mode d'éclairage
Beleuchtungsmodi
Personalizzazioni della modalità di illuminazione
Personalizações do modo de iluminação
Настройка
режимов
подсветки
조명 모드 사용자 지정
ライティングモードのカスタマイズ
照明模式自定义
自定義燈光模式
Preset Modes –
> Fixed:
- Choose a color
> Breathing:
- Select a primary color and up to seven additional colors
- Interval Adjustments: Slowest to Fastest
> Fading:
- Select a primary color and up to seven additional colors
- Interval Adjustments: Slowest to Fastest
> Marquee:
- Select a color
- Direction: Forward or Backward
- Group size: 3,4,5,6
> Covering Marquee:
- Select a primary color and up to seven additional colors
- Interval Adjustments: Slowest to Fastest
- Direction: Forward or Backward
> Pulse:
- Select a primary color and up to seven additional colors
- Interval Adjustments: Slowest to Fastest
> Spectrum Wave:
- Interval Adjustments: Slowest to Fastest
- Direction: Forward or Backward
> Alternating:
- Choose 2 colors
- Moving Selected: two colors moving together
- Moving Unselected: two colors blinking
- Interval Adjustments: Slowest to Fastest
- Group size: 3,4,5,6
> Candle Light:
- Default setting selected for candle light effect
> Wings:
- Interval Adjustments: Slowest to Fastest
Smart Modes –
> GPU Temperature:
- Sets custom LED colors for temperature ranges every 10 degrees Celsius
> CPU Temperature:
- Sets custom LED colors for temperature ranges every 10 degrees Celsius
> FPS:
- Sets custom LED colors for temperature ranges every 10 fps, from 20 to 100
Custom Modes -
> Fixed:
- Choose a color
> Breathing:
- All LEDs on the accessory can be controlled and assigned individually
- Interval Adjustments: Slowest to Fastest
> Waves:
- All LEDs on the accessory can be controlled and assigned individually
- Interval Adjustments: Slowest to Fastest
Audio Modes –
> Level:
- Choose colors for up to 8 cycles
> Sync:
- Choose colors for up to 8 cycles
> Gain:
- Choose colors for up to 8 cycles
> Bass:
- Lighting will react to the bass of audio output
Game Modes –
> C4 Arming (Limited to compatible games):
- Choose 1 color for 40s-11s
- Choose 1 color for 10s-0s
> Health (Limited to compatible games):
- Choose up to 10 colors for every 10% of health
> Grenade Effect (Limited to compatible games):
- Choose 1 color for Incendiary
- Choose 1 color for Smoke

Chatta con il manuale del tuo NZXT Aer RGB 2 utilizzando l'IA

Ottieni risposte istantanee dall'IA dal manuale del tuo NZXT Aer RGB 2

Chiedi qualsiasi cosa sul NZXT Aer RGB 2. Le risposte provengono da questo manuale, con le pagine di riferimento.

Fai una Domanda

0/1000

Consigli Aer RGB 2?

Sì No

Domande frequenti

A

It is best used as a high-airflow PC case fan with customizable RGB lighting. It suits builders who want cooling performance, clean cable routing, and a coordinated visual theme inside their system.

Questa risposta è utile?

A

NZXT CAM is needed to unlock full control of the RGB and fan controller. The fan can still be installed normally, but CAM is the main software for lighting customization and system management.

Questa risposta è utile?

A

Yes. The fan supports daisy-chaining, so you can connect one fan to another using the proper fan-to-fan cable. This helps reduce cable mess and makes multi-fan setups easier to manage.

Questa risposta è utile?

A

Not in the same channel. The instructions warn that Aer RGB 2 fans and newer NZXT RGB accessories should not be mixed with older HUE+ LED strips or older Aer RGB fans on one channel.

Questa risposta è utile?

A

You typically need SATA power, an internal USB 2.0 header, a motherboard fan header or fan controller connection, and the included NZXT RGB cabling. A controller is required for full RGB control.

Questa risposta è utile?

A

The 140mm size is a good choice for users who want strong airflow with potentially lower noise than smaller fans at similar output levels. It is well suited to larger cases and balanced cooling builds.

Questa risposta è utile?

A

Check that your PC is powered off, confirm available headers and controller ports, and make sure your NZXT accessories are compatible. Following the connection order helps avoid installation problems.

Questa risposta è utile?

M: OA-GPT-54-NAN

Vantaggi e Svantaggi

Vantaggi

  • Daisy-chain support reduces cable clutter and simplifies multi-fan RGB setups.
  • Works with NZXT CAM for centralized lighting and controller management.
  • Includes clear installation guidance for power, USB, and RGB connections.
  • Designed to integrate neatly with other compatible NZXT accessories.
VS

Svantaggi

  • Full control depends on NZXT CAM software and a compatible controller.
  • Older NZXT RGB products cannot be mixed in the same channel.
  • Installation requires careful connection order to avoid setup issues.
  • Extra controller and accessory hardware may be needed for larger builds.
M: OA-GPT-54-NAN

Prodotto Specifiche

Dimensioni

140x140x26mm (LxAxP)

Velocità di rotazione

500-1500rpm

Flusso d'aria

51,6-154,9m³/h (30,37-91,16 CFM)

Pressione dell'aria

0,17-1,52mmH₂O

Livello di rumore

22-33dB(A)

Cuscinetto della ventola

Cuscinetto dinamico fluido (FDB)

Tensione

12V

Illuminazione

RGB (8 LED)

Garanzia del produttore

2 Anni

M: GO-GEM-FL-25

Descrizione del prodotto Descrizione

NZXT Aer RGB 2 140: Flusso d'aria intelligente con un tocco di illuminazione personalizzata

L'NZXT Aer RGB 2 140 è pensata per chi assembla PC e vuole qualcosa di più del semplice passaggio d'aria attraverso il case. Unisce il formato da 140 mm a un'illuminazione RGB vivida, offrendo allo stesso tempo un aggiornamento pratico per il raffreddamento e un elemento visivo di grande impatto. Progettata per funzionare con l'ecosistema HUE 2 di NZXT, si integra naturalmente in una configurazione che valorizza cablaggio pulito, effetti sincronizzati e controllo tramite software.

Ciò che colpisce di più è il modo in cui la ventola è pensata per essere integrata, non solo installata. Il sistema di connessione incluso utilizza un controller di illuminazione HUE 2, il supporto all'header USB 2 e l'alimentazione tramite cavo Molex, offrendo agli utenti accesso a comportamenti luminosi dettagliati dentro CAM. Questo significa che puoi regolare tutto, dai colori fissi agli effetti breathing, fading, marquee, alle onde dello spettro e persino alle modalità smart che reagiscono alla temperatura della GPU, della CPU, agli FPS o all'audio.

Per chi ama un interno ordinato, l'approccio in daisy-chain è un grande vantaggio. Più ventole Aer RGB 2 possono essere collegate tra loro con cavi fan-to-fan, e il sistema supporta anche la connessione ad altri accessori HUE 2 tramite cavi dedicati. Questo rende la famiglia di ventole modulare e scalabile, soprattutto nei build più grandi in cui conta avere un'illuminazione coerente su più componenti.

L'installazione è semplice una volta compreso il flusso dei cavi: l'alimentazione va al controller, il controller si collega all'header USB della scheda madre e la ventola entra nella catena HUE 2. NZXT fornisce anche indicazioni chiare sulla compatibilità, aiutando a evitare di mescolare i dispositivi HUE 2 più recenti con le vecchie strisce HUE+ o con le precedenti ventole Aer RGB sullo stesso canale.

Note

  • Ideale per chi è già investito nell'hardware di illuminazione NZXT.
  • CAM sblocca l'insieme di funzioni più ricco e le migliori opzioni di personalizzazione.
  • Verifica la disponibilità di un header USB 2 sulla scheda madre prima di pianificare il build.
  • Il formato da 140 mm la rende una scelta solida per un flusso d'aria equilibrato e per obiettivi di funzionamento più silenzioso.
M: GO-GEM-FL-25

© Copyright 2026 Manual.ly