Einschaltdauer SenderTransmitter duty cycleCiclo di lavoro del trasmettitore1%
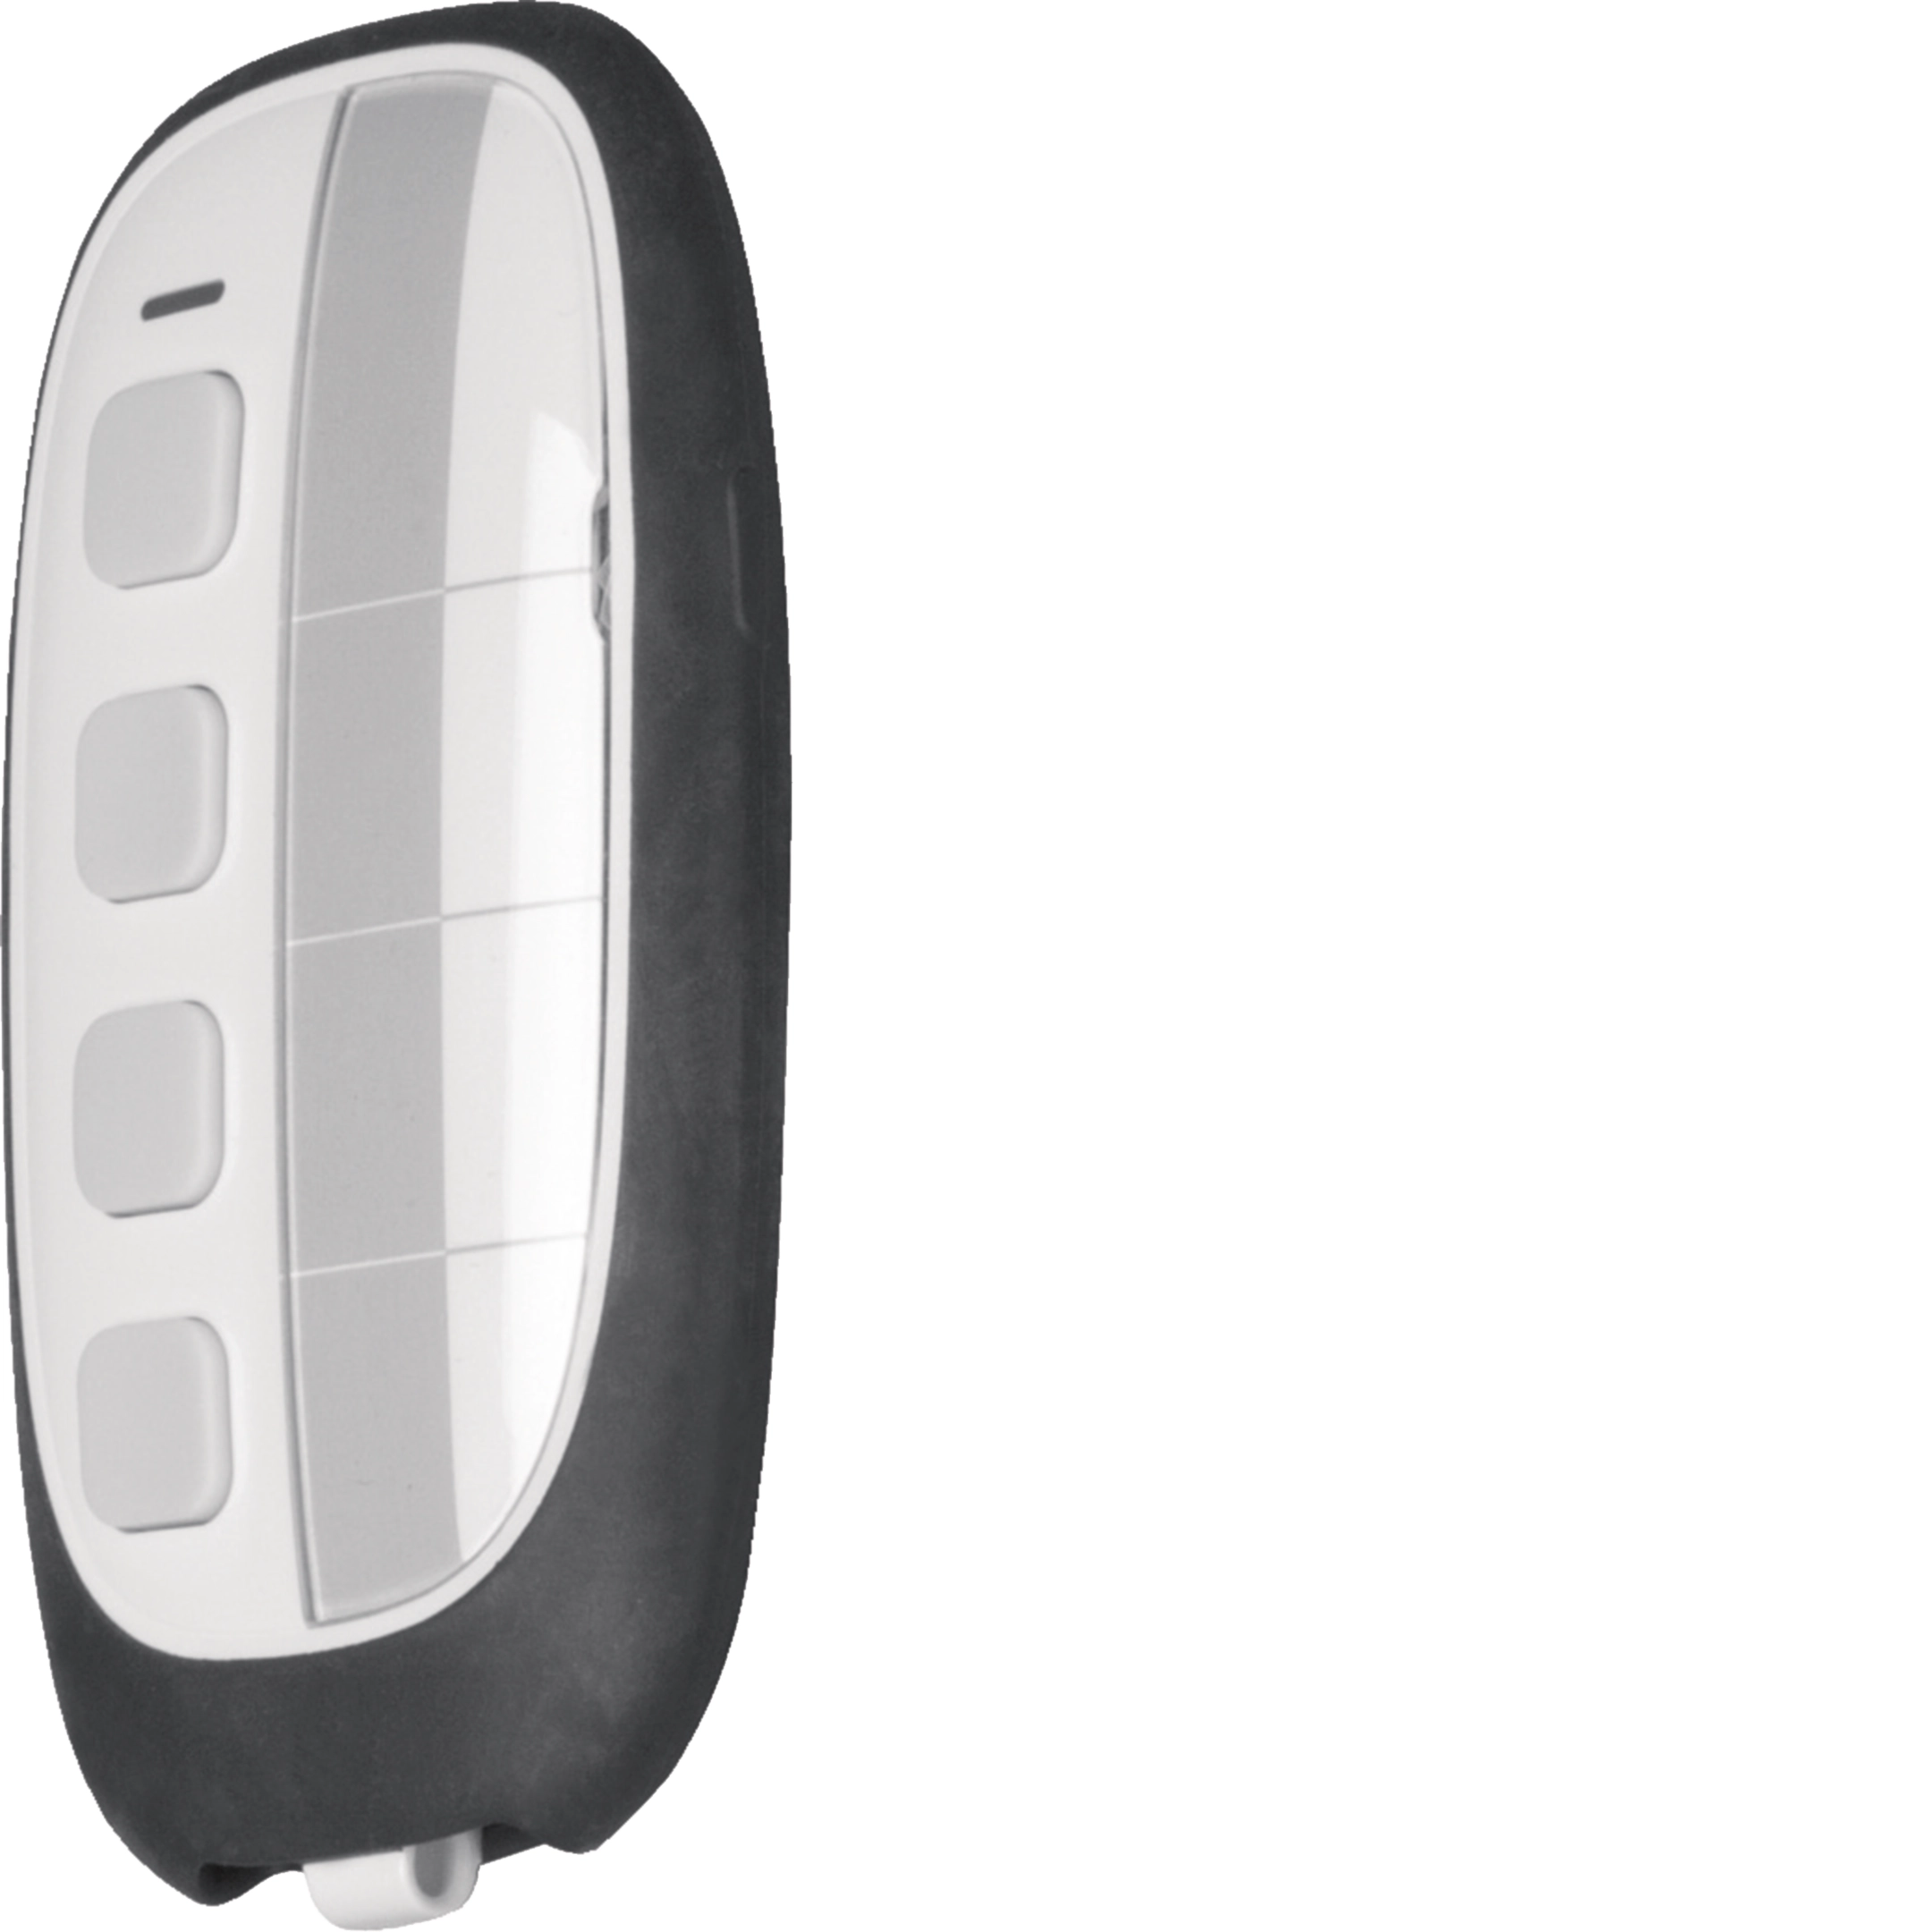
Gli apparecchi servono per il comando remoto di KNX-
Radio ricevitori. Tramite essi è possibile controllare l’illu-
minazione, le tende o le tapparelle, il riscaldamento, ...
Funzioni
• 2 o 4 canali indipendenti di comando tramite il bus KNX.
• LED di conferma di trasmissione
1
• Blocco tasti 3
• Indicazione delle funzioni tramite porta etichette
4.
Congurazione
E’ possibile congurare queste trasmettitori portatili in 3
modi diversi :
•
quicklink& : congurazione senza utensili, direttamente
sull'apparecchio attraverso il tasto
J e il LED (si veda
il
quicklink& relativo alle istruzioni di congurazione)
• tebis TX: congurazione attraverso il dispositivo di Hager
• ETS3/ETS4 attraverso KNX-Radio/TP gateway : base di
dati e descrizione del software applicativo disponibile
presso il costruttore.
Congurazione mediante ETS
Premere il tasto
J per l'indirizzamento per mezzo del
Gateway radio/KNX.
O
Per cambiare il modo di congurazione, occorre
tassativamente effettuare un “ripristino delle
congurazioni di fabbrica” del prodotto.
Blocco tasti
Con il blocco tasti attivato, dopo l'azionamento del tasto di
invio
2 non viene inviato alcun ordine di comando. Il LED di
conferma (v. tabella) si illumina brevemente di arancione.
Clonazione d’emittenti
La clonazione permette di duplicare un’emittente radio “master”
già congurata per creare rapidamente copie tutte identiche.
Come clonare un’emittente?
- Entrare in congurazione premendo il tasto J del
“master” : si illumina il LED
cfg.
- Sul prodotto da clonare ancora in modo "fabbrica", premete
a lungo > 15 s il tasto
J no al 2° livello di lampeggio (più
rapido) del LED
cfg. L’avvenuta clonazione è segnalata dallo
spegnimento del LED.
Ripetere questa tappa sugli altri prodotti da clonare.
- Uscita dal modo clonazione premendo nuovamente il tasto
J del “master”.
L’avvenuta clonazione dell’emittente è segnalata dall’accen-
sione (arancione) del LED
cfg premendo il tasto J .
O
La clonazione è possibile solo fra emittenti munite del
medesimo numero d’entrate. Impossibile modicare un
prodotto clonato compreso il "master": ripristinate le
congurazioni di fabbrica e riprogrammate il prodotto.
Ripristino impostazioni di fabbrica
Premere e mantenere il tasto J no al lampeggio del
LED cfg > 10 s poi rilasciare. La ne del ripristino delle congura-
LED di conferma 1
Azione Tasto del LED Colore del LED Signicato
Azionamento
contemporaneo
dei pulsanti di blocco
3
Acceso sso per 1 sArancio Il modo blocco tasti è attivato
Acceso sso per 1 sVerdel modo blocco tasti è disattivato
Lampeggia per circa 1 s Rosso Livello delle batterie basso
Azionamento di uno dei
tasti di invio
2
Brevemente accesoVerdeL’ordine è stato emesso
Lampeggia per circa 1 s ArancioIl pulsante azionato non è congurato
Brevemente accesoArancio Il modo blocco tasti è attivato
Lampeggia per circa 1 s Rosso Livello delle batterie basso
Spento _- Assenza batterie o livello delle batterie basso
- Non rispetto della polarità delle batterie
zioni di fabbrica è segnalata dallo spegnimento del LED cfg.
Questa operazione provoca la scomparsa totale della
congurazione del prodotto, qualunque sia il modo di
congurazione. Dopo una sostituzione delle pile o un
ripristino delle congurazioni di fabbrica, attendere
15 s prima di procedere ad una congurazione.
Cambio delle batterie
Smontare il coperchio dello scomparto batterie 6.
Rimuovere le 2 pile e inserire le nuove rispettando la
polarità (cambiare sempre le 2 pile contemporaneamente).
Rimontare lo sportello delle pile
6.
e
z
y
E E Bedienungsanleitung
Z Z User instructions
Y Y Istruzioni d’uso
Kann in ganz Europa å und in der Schweiz
Hiermit erklärt Hager Controls, dass der Funksender/-
Empfänger der 2014/53/UE Richtlinie entspricht.
Die EG-Erklärung kann auf der Website eingesehen werden:
www.hagergroup.com
Can be used throughout Europe å and in Switzerland
Hager Controls hereby declares that the radio transmitter/
receiver complies with the 2014/53/UE directive.
The EC declaration may be consulted on the website:
www.hagergroup.com
cfg
Può essere utilizzato in tutta Europa å e in Svizzera
Con la presente Hager Controls dichiara che il
ricetrasmettitore radio è conforme alla direttiva 2014/53/UE.
La dichiarazione CE può essere consultata sul sito internet:
www.hagergroup.com
Korrekte Entsorgung dieses Produkts
(Elektromüll).
(Anzuwenden in den Ländern der Europäischen Union und anderen europäischen
Ländern mit einem separaten Sammelsystem).
Die Kennzeichnung auf dem Produkt bzw. auf der dazugehörigen Literatur gibt
an, dass es nach seiner Lebensdauer nicht zusammen mit dem normalen
Hausmüll entsorgt werden darf. Entsorgen Sie dieses Gerät bitte getrennt von
anderen Abfällen, um der Umwelt bzw. Der menschlichen Gesundheit nicht
durch unkontrollierte Müllbeseitigung zu schaden. Recyceln Sie das Gerät, um
die nachhaltige Wiederverwertung von stoichen Ressourcen zu fördern.
Private Nutzer sollten den Händler, bei dem das Produkt gekaut wurde, oder die
zuständigen Behörden kontaktieren, um in Erfahrung zu bringen, wie sie das
Gerät auf umweltfreundliche Weise recyceln können.
Gewerbliche Nutzer sollten sich an ihren Lieferanten wenden und die
Bedingungen des Verkaufsvertrags konsultieren. Dieses Produkt darf nicht
zusammen mit anderem Gewerbemüll entsorgt werden.
Correct Disposal of This product
(Waste Electrical & Electronic Equipment).
(Applicable in the European Union and other European countries with separate
collection systems).
This marking shown on the product or its literature indicates that it hould not be
disposed with other household wasted at the end of its working life. To prevent
possible harm to the environment or human health from uncontrolled waste
disposal, please separate this from other types of wastes and recycle it
responsibly to promote the sustainable reuse of material resources.
Household users should contact either the retailer where they purchased this
product, or their local government oce, for details of where and how they can
take this item for environmentally safe recycling.
Business users should contact their supplier and check the terms and conditions
of the purchase contract. This product should not be mixed with other commercial
wastes of disposal.
Corretto smaltimento del prodotto
(rifiuti elettrici ed elettronici).
(Applicabile nei paesi dell’Unione Europea e in quelli con sistema di raccolta
dierenziata).
Il marchio riportato sul prodotto o sulla sua documentazione indica che il
prodotto non deve essere smaltito con altri rifiuti domestici al termine del ciclo di
vita. Per evitare eventuali danni all’ambiente o alla salute causati dall’inopportuno
smaltimento del rifiuti, si invita l’utente a separare questo prodotto da altri tipi di
rifiuti e di riciclarlo in maniera responsabile per favorire il riutilizzo sostenibile delle
risorse materiali.
Gli utenti domestici sono invitati a contattare il rivenditore presso il quale è stato
acquistato il prodotto o l’ucio locale preposto per tutte le informazioni relative
alla raccolta dierenziata e al riciclaggio per questo tipo di prodotto.
Gli utenti aziendali sono invitati a contattare il proprio fornitore e verificare i
termini e le condizioni del contratto di acquisto. Questo prodotto non deve essere
smaltito unitamente ad altri rifiuti commerciali.
02
/1
%
Controllo rapido
Non sono un robot
Risposta errata, riprova.
Chatta con il manuale del tuo Berker KNX Wireless Hand Transmitter 2-Channel utilizzando l'IA
Ottieni risposte istantanee dall'IA dal manuale del tuo Berker KNX Wireless Hand Transmitter 2-Channel
Chiedi qualsiasi cosa sul Berker KNX Wireless Hand Transmitter 2-Channel. Le risposte provengono da questo manuale, con le pagine di riferimento.
Fai una Domanda
0/1000
Consigli KNX Wireless Hand Transmitter 2-Channel?
SìNo
Domande
frequenti
A
Serve per controllare da remoto i ricevitori KNX-RF. Le applicazioni tipiche includono illuminazione, tende, tapparelle avvolgibili, riscaldamento e altre funzioni di automazione compatibili negli edifici intelligenti.
Questa risposta è utile?
A
Questa versione è un trasmettitore portatile a 2 canali. La famiglia di prodotti più ampia include anche una versione a 4 canali, ma questo modello si concentra su due comandi configurabili in modo indipendente.
Questa risposta è utile?
A
Può essere configurato in tre modi: quicklink direttamente sul dispositivo, tebis TX tramite un dispositivo di collegamento Hager oppure ETS3/ETS4 tramite un gateway KNX-RF/TP.
Questa risposta è utile?
A
Sì. Un LED di conferma fornisce un riscontro visivo quando viene premuto un pulsante di invio, aiutando gli utenti a verificare che il comando sia stato trasmesso e se sia necessario controllare la batteria o lo stato del blocco.
Questa risposta è utile?
A
La clonazione consente di copiare un trasmettitore master configurato su altre unità con lo stesso numero di ingressi. È utile quando servono più telecomandi identici senza programmare manualmente ciascuno di essi.
Questa risposta è utile?
A
Il trasmettitore utilizza due batterie CR2430. Entrambe devono essere sostituite contemporaneamente e la polarità deve essere corretta. Dopo la sostituzione o un ripristino di fabbrica, attendere 15 secondi prima di riconfigurare.
Questa risposta è utile?
M: OA-GPT-54-NAN
Vantaggie
Svantaggi
Vantaggi
Due pulsanti di invio configurabili supportano un controllo flessibile di luci, tende, tapparelle e riscaldamento.
Molteplici metodi di configurazione lo rendono adatto a installazioni rapide e a progetti KNX professionali.
Il LED di conferma e il blocco tasti migliorano l'usabilità e aiutano a prevenire comandi accidentali.
Il supporto alla clonazione può velocizzare l'implementazione quando servono più trasmettitori identici.
VS
Svantaggi
La modifica della modalità di configurazione richiede un ripristino di fabbrica, che può interrompere l'installazione.
I trasmettitori clonati non possono essere riprogrammati senza reimpostarli e ricominciare da zero.
La sostituzione della batteria deve essere eseguita con attenzione, cambiando insieme entrambe le celle CR2430.
La portata wireless può ridursi in interni rispetto alla specifica di 100 m in campo aperto.
M: OA-GPT-54-NAN
Prodotto
Specifiche
Tipo
Telecomando
Standard
Radio Bus (868 MHz)
Funzione
Controllo
Topologia
Bus, Albero
Dimensioni
83 x 47 x 16 mm
Caratteristiche Speciali
IP50, alimentato a batteria (2 x CR2430)
M: GO-GEM-FL-25
Descrizione del prodotto
Descrizione
Berker Trasmettitore wireless KNX portatile a 2 canali
Il Berker KNX Wireless Hand Transmitter 2 Channel è un telecomando wireless compatto progettato per il controllo quotidiano KNX-RF. Porta un funzionamento semplice basato su pulsanti a illuminazione, tende, tapparelle avvolgibili, riscaldamento e altre funzioni di automazione domestica compatibili. Per gli utenti che desiderano un controllo rapido senza dover usare un pannello a parete o un'app, questo trasmettitore portatile offre una soluzione pratica e affidabile.
Controllo fluido per spazi intelligenti
I suoi due pulsanti di invio configurabili in modo indipendente rendono facile assegnare azioni diverse a zone o dispositivi diversi. Ciò significa che una pressione può attivare una scena luminosa, un'altra può abbassare le tapparelle, oppure lo stesso trasmettitore può essere adattato alla routine di una stanza. Un LED di conferma fornisce un riscontro visivo, così sai che il comando è stato inviato.
Opzioni di configurazione flessibili
Uno dei punti di forza di questo trasmettitore è l'ampio supporto di configurazione. Può essere configurato con quicklink direttamente sul dispositivo, tramite tebis TX o tramite ETS3/ETS4 usando un gateway KNX-RF/TP. Questo lo rende adatto sia a installazioni semplici sia a progetti KNX più avanzati. Un blocco dei tasti aiuta anche a prevenire pressioni accidentali, utile nelle aree condivise o quando il dispositivo viene trasportato in una borsa o in una tasca.
Progettato per un uso pratico
L'unità è progettata per essere comoda da tenere in mano e funziona con due batterie CR2430. Con una portata di trasmissione in campo aperto fino a 100 metri, offre una copertura wireless solida per molti ambienti residenziali e commerciali leggeri. Il trasmettitore supporta anche la clonazione, consentendo di duplicare un'unità master già configurata su dispositivi corrispondenti, risparmiando tempo durante l'implementazione.
Cosa lo rende particolarmente utile
Oltre al semplice controllo, il dispositivo è pensato per integrarsi nei flussi di lavoro reali di installazione. La funzione di ripristino di fabbrica, le indicazioni per la sostituzione della batteria e il comportamento chiaro del LED indicano tutti un prodotto progettato per un funzionamento affidabile e una manutenzione gestibile. È una buona scelta per gli utenti che apprezzano la flessibilità KNX ma desiderano comunque un'interfaccia portatile e facile da usare.
Note
Dopo la sostituzione della batteria o un ripristino di fabbrica, attendere 15 secondi prima di riconfigurare.
La clonazione è possibile solo tra trasmettitori con lo stesso numero di ingressi.
Entrambe le batterie devono essere sempre sostituite contemporaneamente.
Il trasmettitore è più adatto ad ambienti KNX-RF in cui la comodità del wireless è importante.